Shopping Cart Support
Inventory Management
There are several ways of controlling inventory within your store, to allow for easy inventory management. One way is to configure settings on a storewide basis. The other is to change inventory settings on a per item basis. The guide below will outline how to manage your inventory and options on customizing inventory management for your online store.
Storewide Inventory Settings
You will use the general store settings if you want to make changes to inventory management on your store as a whole. To do this:
- Go to Settings General Store Settings
- Scroll down to the Inventory Options section.
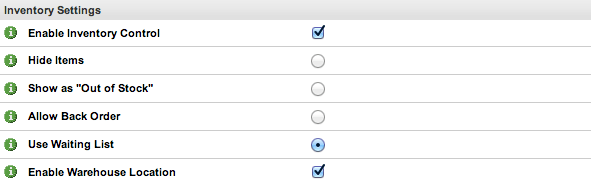
- Check the Enable Inventory Control checkbox if you want to display how many items are in stock to the customer.
- You may Choose 1 of the following options:
- Choose Hide Items if you want items out of stock to 'hide' (not show up) for the customer.
- Choose Show as Out of Stock if you want it to display 'Out of Stock" to the customer when there are no longer any of that product in inventory.
- Choose Allow Back Order if you want customers to be able to back order products that are out of stock. Back Order will display to the customer when the item is out of stock.
- Choose Use Waiting List if you would like customers to add themselves to a waiting list when products are out of stock.
- Check the box next to Enable Warehouse Location if you'd like to enable product Location, Aisle, Bin and Custom Location fields to display on packing slips.
Per Item Inventory Settings
You will use per item settings if you want to make inventory management changes to specific items rather than to all products in general. To do so:
- Go to Products View/Edit
- Choose any product you want to make changes to and click Edit.
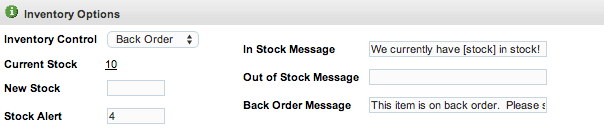
- Under the Inventory Options section, you can change the inventory control for the particular item in the Inventory Control field.
- Choose Default if you want to use the default inventory control settings in the Settings General Store Settings section.
- Choose Hide Items if you want items out of stock to 'hide' (not display) for the customer for this product.
- Choose Out of Stock if you want it to display 'Out of Stock' to the customer when that product is no longer in inventory.
- Choose Back Order if you want customers to be able to back order products that are out of stock. Back Order will display to the customer when the item is out of stock.
- Choose Waiting List if you would like customers to add themselves to a waiting list when products are out of stock.
Note: Any Inventory Control changes you make in this section will only affect the specific product you have chosen, regardless of what is set up in the default section (Settings General Store Settings).
Stock Alert
The stock alert will send you an email when an item gets low in stock. The system has defaulted to 0, so to receive the alert, change the number to 1 or higher. The stock alert email will be sent when the stock reaches a number BELOW what you set for this feature. To change this number:
- Go to Products View/Edit
- Choose any product you want to make the change to and click Edit.
- Under the Inventory Options section, type in the number you would like to receive your stock alert at in the Stock Alert field.
- Click Save Changes
Update Item Stock Number
There are two ways to update the stock number. This can be done by going into the item itself and changing the number. You can also see a list of all of your products at once and change multiple stock numbers at the same time.
To change by item:
- Go to Products View/Edit
- Choose any product whose stock number you'd like to change and click its "Edit" button
- On the Information Tab, update the Stock number under the Inventory Options section.
- Click Save Changes.
When changing the Stock number, you can either type in the new stock number, or +[number] to add to the existing inventory. For example, if your store has 10 units in stock and you receive a shipment of 5 new units, you can either type in 15 and save the page, or type in "+5" to have the store automatically update to the new on hand quantity.
Additional Information: At times, you may notice that your store's inventory will read as a number in stock plus (number on hold) written next to it. This is to alert you that while you may have items physically in stock in your warehouse, some of them may be tied to pending orders in your store.
In other words, let's say your product's Stock number says "15 (+5 on hold)." This means that you have 20 units of the item in your warehouse. 15 items are available for purchase, while 5 items are tied to pending orders. This is intended to let you know that although your warehouse has 20 of the item, 5 of those units have been purchased. When those pending orders are processed and shipped, the "On Hold" items are removed from the Stock display.
To Update Multiple Stock Numbers Simultaneously:
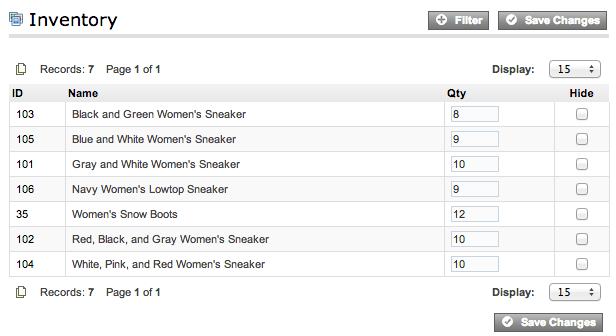
- Go to Products Inventory
- Update the numbers for each product in the Qty. fields.
- Click Save Changes.
Manage Stock Numbers for Products with Multiple Options
Your store may have an item that comes in multiple sizes and colors. You can manage the stock numbers of each product option for that item. For example if you sell shirts, you can track the stock number of each shirt. So you will know the exact quantity of small yellow shirts, small blue shirts, medium yellow shirts, etc.
- Go to Products View/Edit
- Choose an item that has multiple options and click Edit.
- Go to the Options Tab.
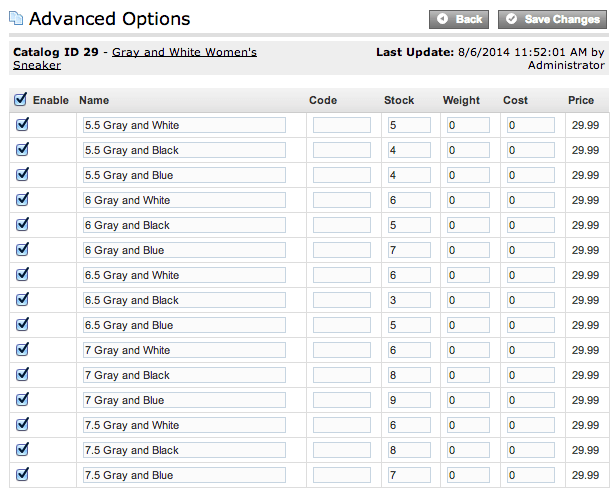
- Select Advanced Options
- Check the Enable checkbox next to each product. Even if you do not sell a particular option combination, you must still enable it and enter '0' for the stock number so customers cannot purchase it.
- Type in the Code, Stock number, Weight, and Cost of each product. The weight you enter will ADD to the weight entered on the Information tab of the product.
- Click Save changes.
Import/Export Product Inventory Information
You can import and export product inventory information into any CSV file. This allows you to edit your information in a spreadsheet editor.
Export:
- Go to Products Export/Import
- Click the Export Data button in the Products Inventory section.
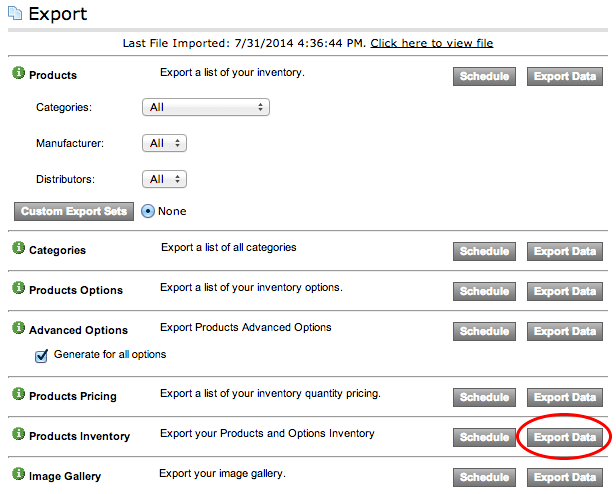
- Click on the link that says "Click Here".
- Click Open.
- Your product inventory information will open in the Spreadsheet editor you have installed on your computer, such as Microsoft Excel®.
Import
- Go to Products Export/Import
- In the Inventory field in the Import section, click the link that says "Sample File" following Update Products and Options Inventory.
- Click Open.
- You may now add Inventory information to the proper columns. You will replace the sample information that has been populated in the spreadsheet with your own information.
Note: Do not remove, add, or edit any columns to this file. If you do not need a column, please leave it blank. This is the exact format needed to import your Inventory information properly.
- Here is a description of each field:
- ID: This field is required. It is the unique product id (SKU or Part Number) of the product.
- Name: This is the name of the product.
- Stock: This is the stock (Quantity On Hand) of the product.
- Once you have filled in your product information, save the file to your computer.
- Go to Products Export/Import
- Browse for your file in the Inventory field in the Import section.
- Click Import Data
- You will receive a page stating that the import is completed, and how many records were updated.