1stPayMobile Support
Printing Receipts
Configure Mobile Receipt Settings
Before you can print receipts, you must first configure receipt settings. This can be done from the app or in the Transaction Center.
From the App:
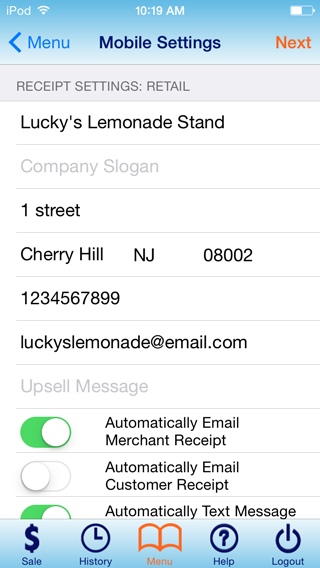
- Upon account activation, when you first set up the app you will be prompted to configure receipt settings. You may also edit them from the app by going to Menu Mobile Settings.
- Enter Store Name, Slogan, Business Address, Phone Number, Email Address and Upsell Message. Slogan, Phone Number and Upsell Message are not required.
- Use the toggle swithces to select whether you'd like to automatically email a receipt to the merchant email address for each transaction. You can also select whether to automatically email the customer a receipt (if they provide an email address) and if you'd like to text message your customers' receipts (if they provide mobile phone number).
- Tap 'Next'.
From the Transaction Center:
- Log into your Transaction Center here.
- You will be brought to the Product Hub. Select Transaction Center.
- If your account is multi-MID, select the MID that has 1stPayMobile enabled.
- Go to Main Options Mobile Settings.
- In the Emailed & Printed Receipt Settings section, enter your business information in the spaces provided. The information you enter here will appear on your printed and emailed receipts. Required Fields are marked with an asterisk (*).
- Click Save Settings.
- If you'd like to learn more about the other Mobile Settings, see this article.
Configure Receipt Printer
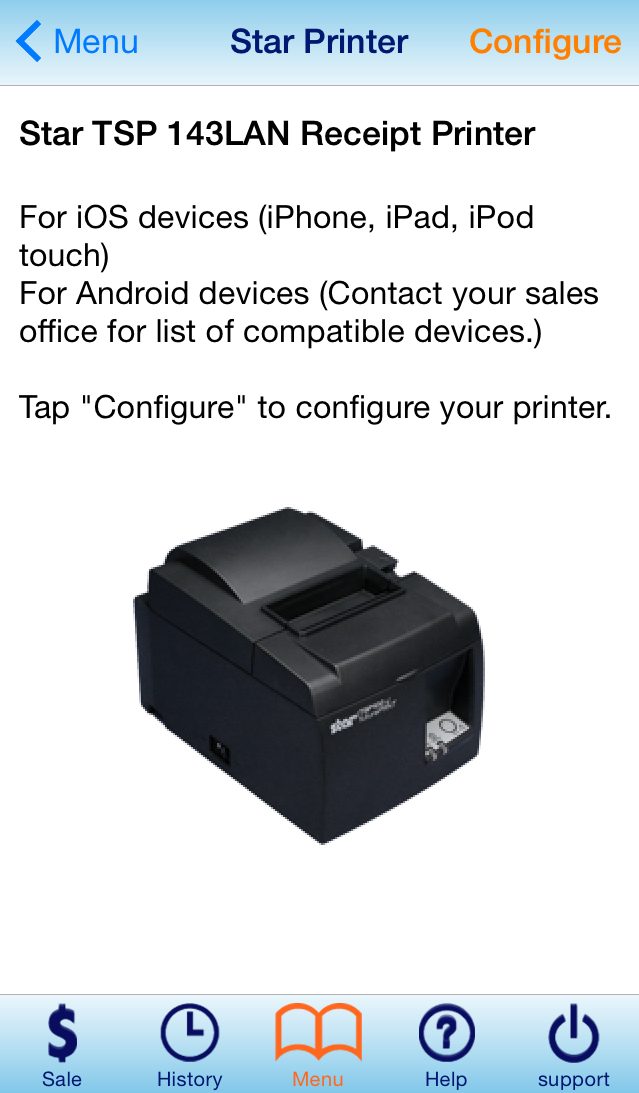
Before you can print receipts, you must also configure your Star Receipt Printer. 1stPayMobile is compatible with the Star TSP 143LAN Thermal Receipt Printer.
- Plug in your receipt printer, and ensure that it is powered on.
- Plug one end of an Ethernet cable into the back of your printer, and the other end into the back of your Wi-Fi Router.
- Ensure that the Wi-Fi Router is plugged in and turned on.
- In your phone or iPad's settings, ensure that it is connected to the same Wi-Fi that the printer is connected to.
- In the 1stPayMobile App, select Menu from the bottom menu.
- Under Equipment, tap Star Printer.
- In the top right, tap Configure.
- A list of available devices should appear. Select your Star Printer from the list.
- A dialog box should appear saying that the Printer has been Configured. Tap OK.
Print Receipts
After running a transaction, you will be presented with the option of printing, emailing or texting a transaction receipt. You can also set your account up to automatically email a merchant copy, as well as automatically sending the customer a receipt via email or text. See Configure Mobile Receipt Settings above for more details on that.
- Run a transaction, and collect customer signature.
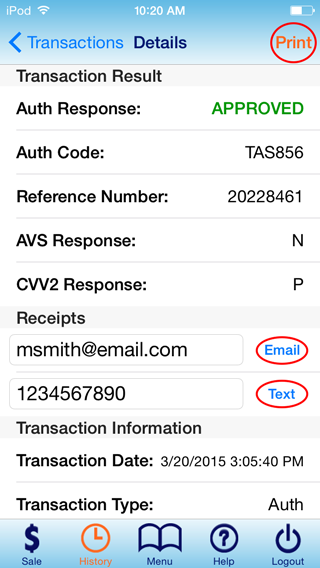
- Once the transaction has been approved, you will be brought to the Transaction Detail screen. To print the receipt with your Receipt Printer, tap Print in the top right corner.
- To email the receipt to the customer, enter customer email address in the Email textbox in the Receipts Section if it hasn't already been filled in. Then tap Email.
- To text the receipt to the customer, enter the customer's mobile phone number in the Phone Number textbox in the Receipts Section if it hasn't already been filled in. Then tap Text.