1stPayMobile Support
Store and Forward (Offline Mode)
If your internet connection fails, you have the ability to process transactions offline until they can be pushed through with an internet connection. First, you must enable offline mode. Please note that this will not verify card information, it simply captures information until it can be pushed through with an internet connection. Therefore, you must accept risk for all disputed and/or rejected transactions.
Enable Store & Forward (Offline Mode)
Store & Forward is for Swiped Transactions Only, Keyed Transactions Are Not Allowed. If you'd like to automatically send an email or text message receipt to the customer after a Store & Forward transaction is processed, you MUST enable these fields for swiped transactions and choose Email Address or Phone Number as a required field. To do this:
- Log into your Transaction Center here.
- You will be brought to the Product Hub. Select Transaction Center.
- Go to Main Options Mobile Settings.
- In the Mobile Settings section at the top, click the radio button next to On for Enable Store & Forward.
- In the Optional Cardholder Information section, mark off the radio buttons in the Require when swiping column next to Phone Number and/or Email Address to make them required, and click "Save Settings". If "Automatically Email Customer Receipt" is turned ON, the customer will get an emailed receipt after the offline transaction is submitted for processing and approved.
Process Transactions in Store & Forward (Offline Mode)
Once Store & Forward is enabled in Mobile Settings, you will be able to activate it for offline processing. 1stPayMobile will automatically go into Store & Forward mode if there is no internet connection, or you can manually turn it on. When manually turned on, 1stPayMobile will remain in Store & Forward Mode until it is turned off. Only swiped transactions may be submitted in Offline Mode, keyed transactions are not allowed. To manually turn on Store & Forward:
- Log into the 1stPayMobile using your User PIN.
- If your account is Multi-MID, select the MID you'd like to access.
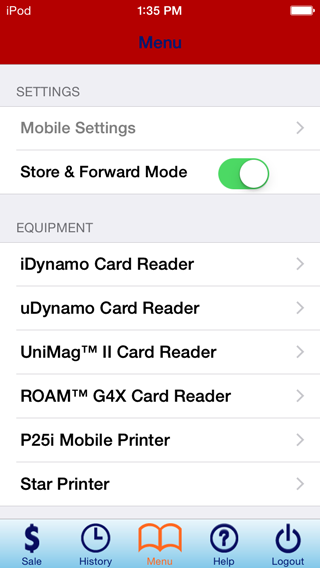
- In the bottom menu, tap Menu.
- Under Settings, you will see Store & Forward Mode, with a toggle switch next to it. Tap the switch to turn it on.
- A popup box will appear stating, "Entering Offline Mode. Merchant Accepts risk for all disputed and/or rejected transactions." Tap OK.
- The top bar will turn red to signify offline mode.
Processing Transactions:
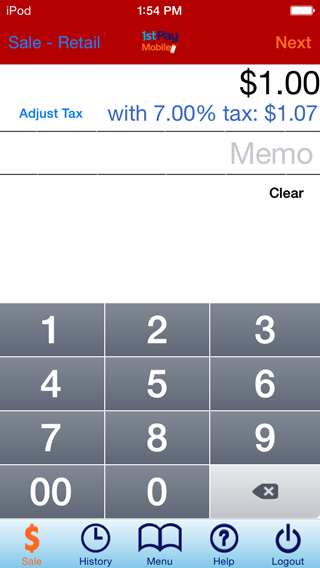
From the Sale Screen, enter a transaction as usual. The main difference in Offline Mode processing will be that instead of receiving an Approved or Declined message for transactions, the Authorization Response will always be "Pending". While in offline mode, you cannot access certain functions like Mobile Settings or History.
Note: All offline transactions must be manually processed once an internet connection is available. Read below for instructions.
Manually Process Offline Transactions
Once an internet connection is available, 1stPayMobile should automatically turn Store & Forward off. If you turned it on manually, you must return to the 1stPayMobile Menu and turn Store & Forward off by toggling the switch to the OFF position. To process transactions ran during offline mode:
- Enter your mobile PIN to log into the 1stPayMobile App.
- If your account is Multi-MID, select the MID you'd like to access.
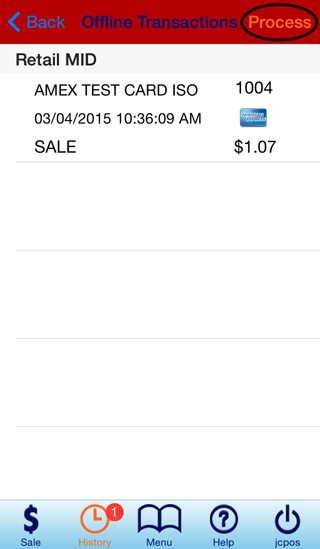
- In the bottom menu, tap History.
- Select Offline Transactions.
- Tap 'Process' in the top right corner.
- A popup will appear confirming that you are ready to process. Tap OK.
- The Transaction Results Summary will appear. A green checkmark indicates an approved transaction, and a red X indicates a declined transaction.
- Declined transactions may be resubmitted for processing, or deleted. To delete, select Failed Offline Transactions from the History Screen. Tap Edit, then delete all desired transactions.