1stPayPOS Support
Employee Management
Employee Management allows you to create and edit logins for employees, such as servers and managers. You may also create employee shifts, edit employee permissions, and generate employee time clock reports.
Add New Employee
- Go to www.1stpaygateway.net and click Sign In at the top right.
- Select Transaction Center. If you're already in the App, tap the tab on the left side to open the menu, and select Go to Product Hub.
- You will be brought to the Product Hub. Select Employee Management:

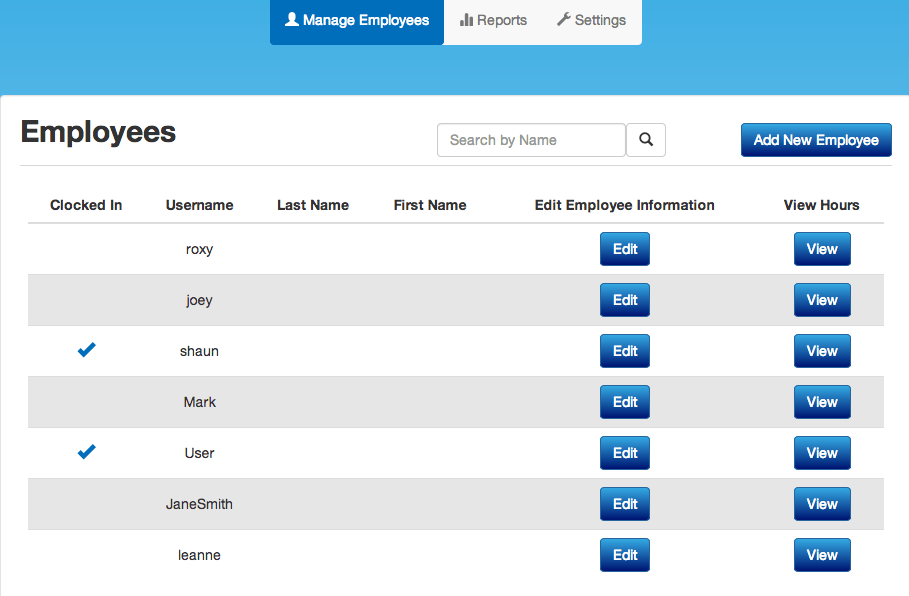
- You will be brought to the Manage Employees Screen. Click Add New Employee at the top right.
- Create a username, PIN, and other desired information. Specify whether or not this employee is a manager by checking the checkbox. The Manager option gives that user access to every function of the app.
- In the Merchant ID's area, click Select MIDs to select the merchant accounts the user can access and click Done when complete.
- Click 1stPayPOS Settings to expand the section. The 1stPayPOS Settings allow the merchant to customize user app settings and permissions. Select the permissions you'd like to grant that user.
- Click Save Changes.
- If you'd like to edit this information, return to the Manage Employees page. Click Edit next to the employee you'd like to change, and you will be returned to the Edit Employee Screen.
View and Edit Hours
- Go to www.1stpaygateway.net and click Sign In at the top right.
- Select Transaction Center. If you're already in the App, tap the tab on the left side to open the menu, and select Go to Product Hub.
- You will be brought to the Product Hub. Select Employee Management.
- You will be brought to the Manage Employees Screen. Click View under the View Hours Column for the employee whose hours you'd like to view or edit.
- You will be brought to the View Employee Hours Screen.
View Hours for a Date Range
- Set the start date and end date using the calendar icons, and click Go.
- All shifts within that date range will display. You can then edit or delete those shifts as necessary with the Edit and Delete buttons.
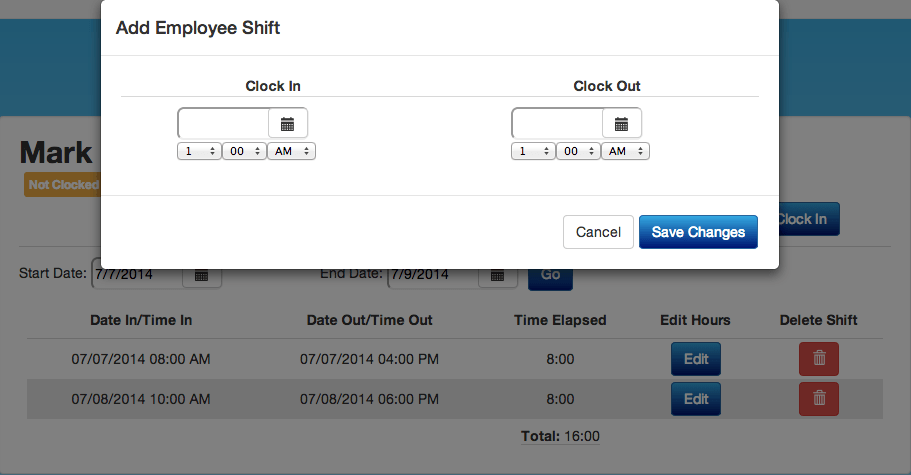
Create a Shift
- Click Add Shift.
- A pop-up will appear that allows you to enter Clock In and Clock Out Time and Date. Click the calendar icon to select the dates, and use the dropdown menus to set times.
- Click Save Changes.
Manual Clock-In
If for some reason, the employee is unable to clock in from the iPad POS system, you may clock them in manually from Employee Management.
- Navigate to the View Employee Hours screen for that employee
- Click Manual Clock In
- A pop-up will appear that allows you to select the date and time for the employee to be clocked in.
- Click Save Changes.
As Manual Clock-In does not have an end date, they will now be clocked in, starting from the time you set. They will need to clock out from the app to end this shift, or you can edit the shift and add an end time and date.