1stPayPOS Support
Inventory
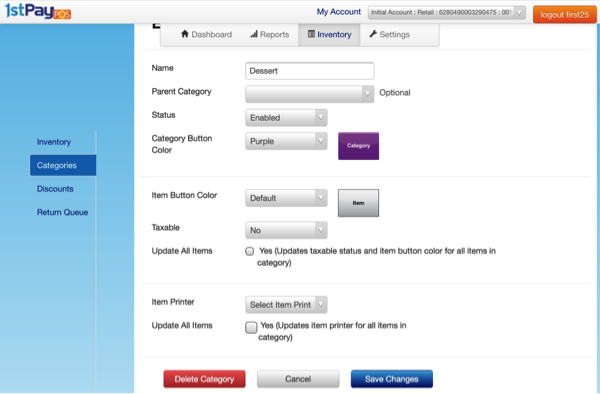
Create Categories
Setting up categories makes it easier to find products. If the merchant is going to use categories, it is best to create categories before creating the products (inventory).
- In the POS Portal, click on the Inventory tab at the top to view or add products and categories.
- Click Categories on the left side of the page.
- Click Add New Category.
- The merchant can customize each category by color. They can also create a sub-category by simply assigning it to an existing parent category.
When setting up the kitchen printer, merchants can assign the items and categories that will print to the kitchen printer. The merchant must do the same if they create a sub-category within a main category.
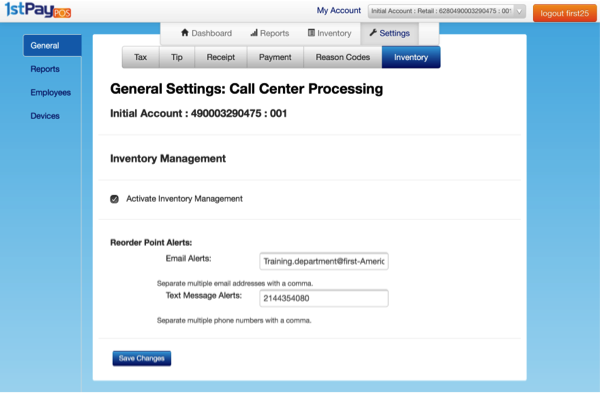
Inventory Management
This is the second of 2 Inventory buttons. The Inventory Button under Settings if for Inventory Management. It allows the merchant to set up reorder alerts. An alert can be sent via email or text. The merchant can set a reorder count for each item in the inventory section.
- In the POS Portal, go to Settings Inventory
- Check the check mark box next to Activate Inventory Management.
- If you'd like to receive email alerts, enter the email address(es) you'd like in the box.
- You can set up text message alerts in addition to or instead of email alerts. Just enter the phone number(s) you'd liek to receive the alerts to in the Text Message Alerts box.
- Click Save Changes
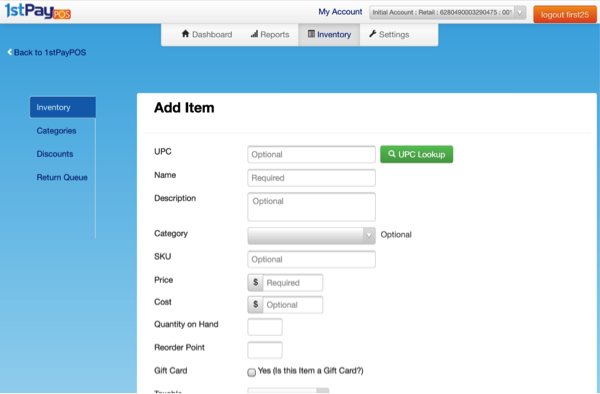
Adding Inventory
- Click on the Inventory button on the left side to add/view products.
- Click Add Item to add a new product or click Edit to edit an existing product.
- Items must be assigned to a category or sub-category to appear in the app. Categories must be created before creating the product.
- Fill in information on product. When all desired information is entered, click Add Item.
Tip: You can also add bulk items from an Excel document by using the Bulk Create or edit items using Bulk Edit. This can only be done through the Product Hub from a computer. See below for detailed instructions.
Bulk Upload Items
- In the 1stPayPOS Portal, click on Inventory in the top menu, and inventory will be displayed.
- Click Bulk Create.
- Click Download Sample.
- An Excel CSV file will download. This will serve as an example for you to follow when formatting your own sheet.
- Edit the file but do not delete any of the columns; even if unused. This will cause the upload to fail. If you do not wish to use a column, simply leave the rows in it blank.
- After saving your changes, go back to the 1stPayPOS Portal Bulk Create Inventory Items screen. Click Browse.
- Locate the CSV file you just created, and click Upload. (If you saved it with the same title as the downloaded file, it will be BulkItemUpload.csv)
- The item(s) will upload into the inventory.

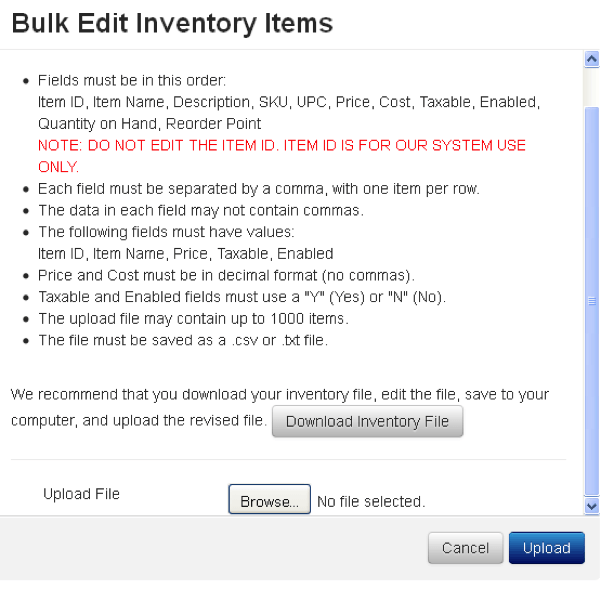
Bulk Edit Items
Bulk Edit is used only to edit the merchant's current inventory. This can only be done through the portal from a computer by logging into the Transaction Center and then accessing the 1stPayPOS Portal.
- In the 1stPayPOS Portal, click on Inventory in the top menu, and inventory will be displayed.
- Click Bulk Edit.
- Click Download Inventory File. This will download the merchant's entire inventory.
- Edit the file but do not delete any of the columns; even if unused. This will cause the upload to fail, or information to be deleted. If you do not wish to use a column, simply leave the rows in it blank.
- After saving your changes, go back to the 1stPayPOS Portal Bulk Edit Inventory Items screen. Click Browse.
- Locate the CSV file you just edited, and click Upload. (If you saved it with the same title as the downloaded file, it will be inventory.csv)
- The item(s) will be updated in the inventory.
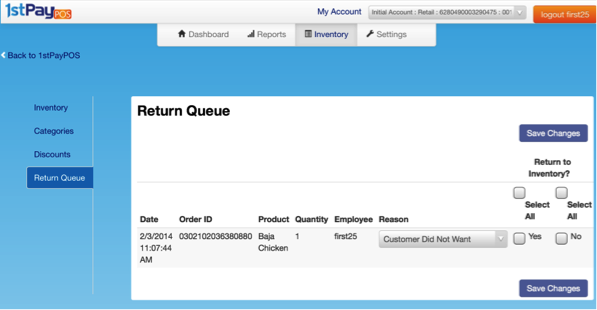
Return Queue
The Return Queue will show the list of products that were returned. It will allow the merchant to either return the products to inventory or not.
- Go to Inventory Return Queue
- A list of returned items will appear with the reason code listed for the return. To designate whether the item will be returned to the inventory, click the Yes or No box for each product.
- Click Save Changes.