1stPayPOS Support
Loyalty Program
Customer Loyalty Program Setup
- First, go to the Product Hub. If using a computer, go to this site , select Transaction Center and enter your login credentials. If in the 1stPayPOS app, tap the tab on the left to open the menu, and select Go to Product Hub.
- In the Product Hub, select Gift Cards & Loyalty
- The Gift Cards & Loyalty Dashboard appears. Click the Gift Cards & Loyalty link in the top menu.
- Navigate to Settings in the left side panel. If you are setting it up for the first time, the Settings option may already be selected.
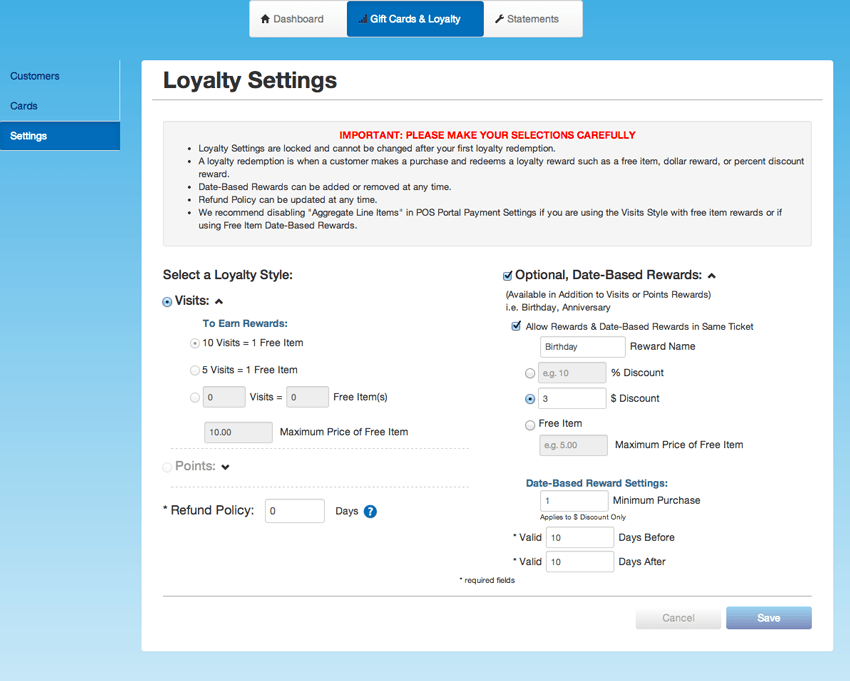
- The merchant will see a warning on the Loyalty Settings page. Once they select the loyalty program they will use, it cannot be changed later after the first redemption. The merchant can choose between 2 loyalty programs: Visits and Points.
-
If Visits-Based Loyalty:
The merchant must choose how many visits equal a free item and the refund timeframe for rewards.
If Points-Based Loyalty:
The merchant must choose what dollar amount equals how many points and the refund timeframe for rewards.
There is a 1 day delay in posting Loyalty Rewards but rewards are not available until the Refund Policy timeframe has elapsed.
- The Optional, Date-Based Rewards can be used in addition to the Visits or Points reward system for "special occasion" rewards, such as birthdays. The merchant can set a minimum purchase or a date-based reward.
- Click Save when settings are configured.
Customer Setup
You will need to add each customer's information into the Loyalty program to set them up with an account.
From the Product Hub:
- First, go to the Product Hub. If using a computer, go to this site, select Transaction Center and enter your login credentials. If in the 1stPayPOS app, tap the tab on the left to open the menu, and select Go to Product Hub.
- In the Product Hub, select Gift Cards & Loyalty
- The Gift Cards & Loyalty Dashboard appears. Click the Gift Cards & Loyalty link in the top menu.
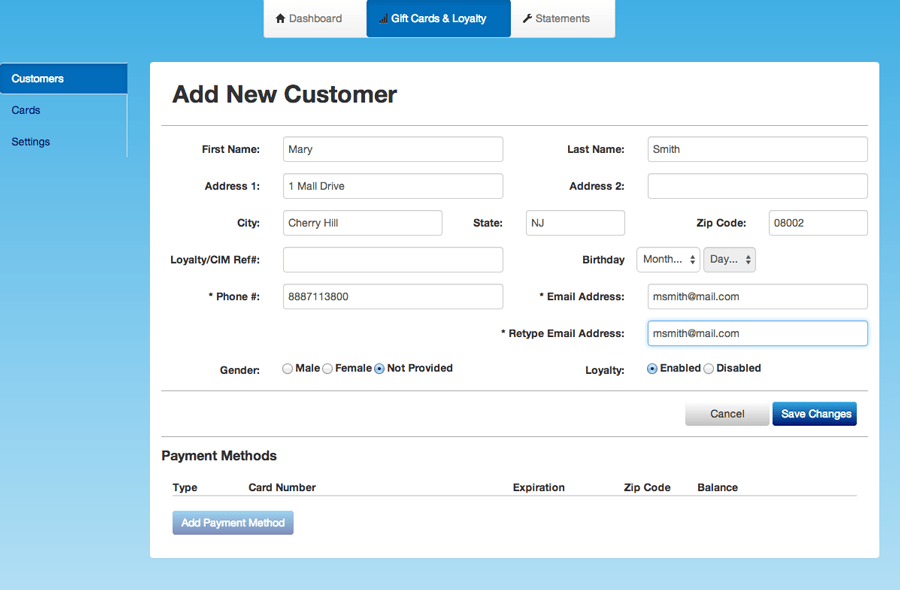
- You will be brought to the Customers Screen. Click Add New Customer.
- You will be brought to the Add New Customer screen. Input all desired information, and click Save Changes.
- You can edit customer information by returning to the Customers Screen, and clicking the Edit button next to the desired customer. Edit desired information, and click Save Changes.
From the 1stPayPOS App:
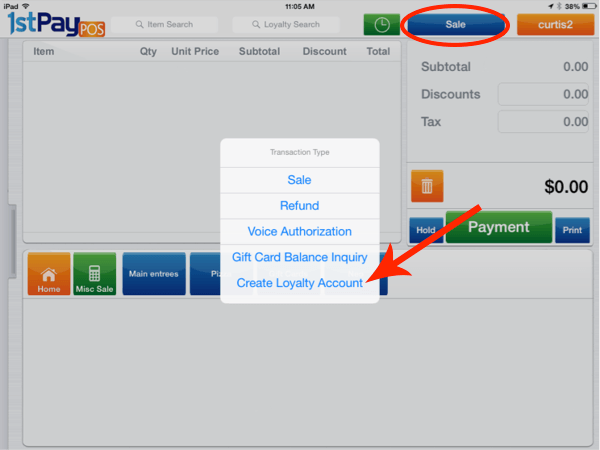
- Click on the Sale button and a list of options will appear. Click Create Loyalty Account.
- The Create Customer Loyalty Account box will appear. Enter all desired information. Only the information in red is mandatory.
- Tap Create Customer.
Customer Setup after Sale in 1stPayPOS App:
After a sale is completed, you have the ability to add customers to your loyalty program at that time.
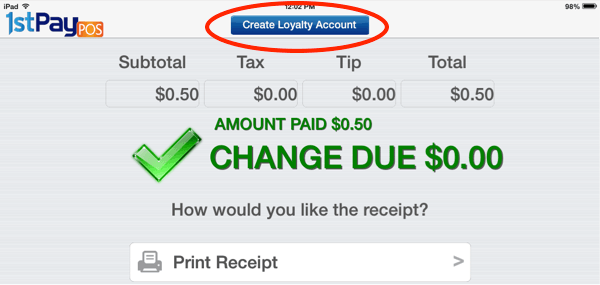
- From the Payment Screen, tap Create Loyalty Account.
- To save time, you only need to add phone # and an email address to quickly set up a customer. Other information may also be filled in, if desired.
- Tap Create Customer.
- The customer will receive an email with the website (http://My1stRewards.com) and a password to complete their Loyalty account setup.
There is a 1 day delay in posting Loyalty Rewards, but rewards are not available until the Refund Policy timeframe has elapsed.
Earning Loyalty Rewards
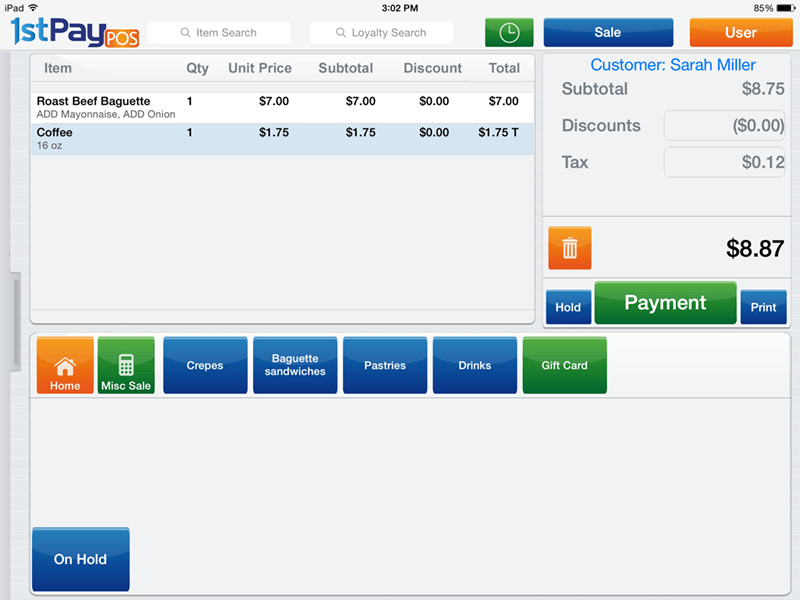
- To add loyalty rewards to a customer, search for the customer in the Loyalty search field from the 1stPayPOS app. This attaches the loyalty customer to the sale so they can earn the rewards for the transaction. The loyalty customer must be added before the sale is finalized
- The Loyalty Customer appears. Tap the customer's name.
- The customer's Loyalty profile appears. The customer is now linked to the sale. Click close.
- The customer's name appears on top of the Sale section. Once the sale is complete, the customer's phone number and email address are conveniently filled in, and the loyalty points or visit will be added to their loyalty balance.
Redeeming Rewards
Points-Based Rewards:
- After searching for a Loyalty Customer in 1stPayPOS's Search Loyalty box, select Redeem on the customer Loyalty Summary screen.
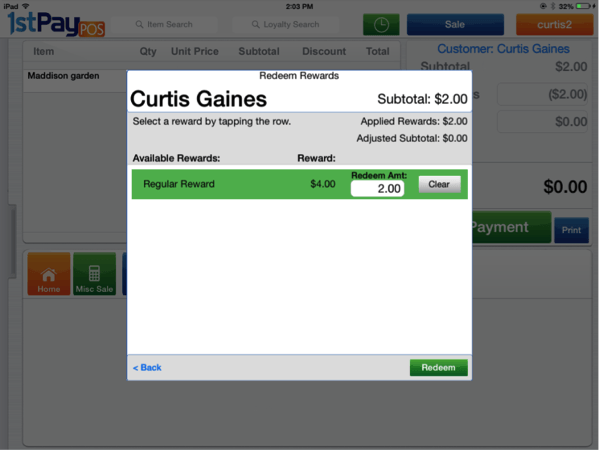
- The customer's Redeem Rewards option pop-up will appear. Tap the Available Reward to be redeemed.
- The available reward is selected. For Points Reward, enter the Redeem Amount and tap Redeem.
- The Redeem Amount in the Discount field is deducted from the total sale amount. Tap Payment to complete the sale.
- If the customer owes a remaining balance, the merchant will be prompted for payment for the remaining balance to complete the sale.
- When payment has gone through, the Loyalty Customer's phone number and email are conveniently filled into receipt options. Tap Done.
Visits-Based and Date-Based Rewards:
- After searching for a Loyalty Customer in 1stPayPOS's Search Loyalty box, select Redeem on the customer Loyalty Summary screen.
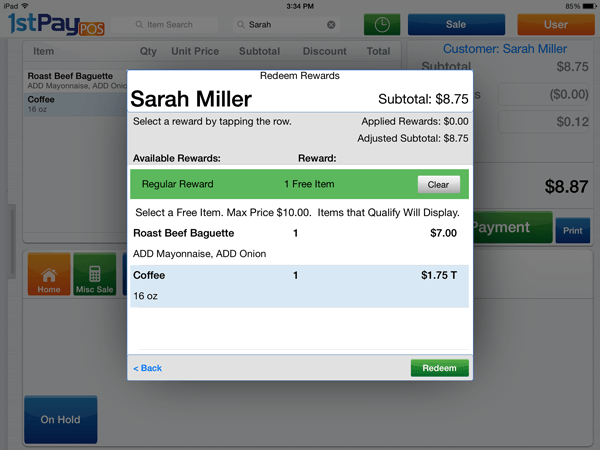
- The customer's Redeem Rewards option pop-up will appear. Tap the Available Reward to be redeemed.
- Select the item(s) from the customer's cart that qualifies for the rewards redemption.
- After all eligible items are selected, tap Redeem.
- The Redeemed Item will be labeled as Free Item. Tap Payment to complete the sale.
- If the customer owes a remaining balance, the merchant will be prompted for payment for the remaining balance to complete the sale.
- When payment has gone through, the Loyalty Customer's phone number and email are conveniently filled into receipt options. Tap Done.
Editing a Loyalty Customer
Editing a Loyalty Customer can be done within the Product Hub or within the 1stPayPOS app.
From the Product Hub:
- First, go to the Product Hub. If using a computer, go to this site, select Transaction Center and enter your login credentials. If in the 1stPayPOS app, tap the tab on the left to open the menu, and select Go to Product Hub.
- In the Product Hub, select Gift Cards & Loyalty
- The customers page will be displayed. Click the Edit button next to the customer you'd like to edit.
- The Profile Data section comes up. From here, you have the ability to add additional information if needed, such as birthday. You may also edit existing information.
- Click Save Changes.
Adding Cards to Loyalty
From the Product Hub:
If you have gift card services, you can add a gift or credit card to a Loyalty Customer as a way to track rewards. i.e. Kroger Plus card.
- First, go to the Product Hub. If using a computer, go to this site, select Transaction Center and enter your login credentials. If in the 1stPayPOS app, tap the tab on the left to open the menu, and select Go to Product Hub.
- In the Product Hub, select Gift Cards & Loyalty
- The customers page will be displayed. Click the Edit button next to the customer for whom you'd like to add a card.
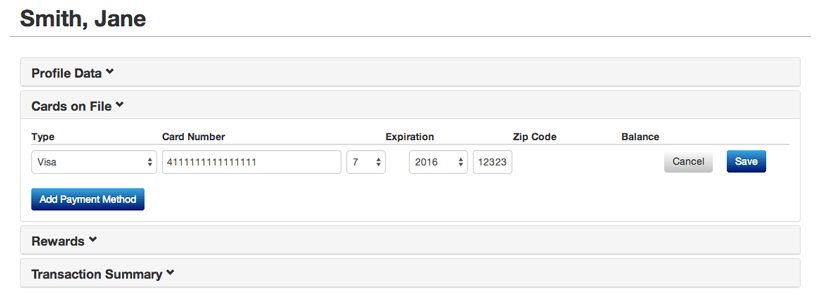
- Below the customer information, click Add Payment Method in the section named Cards on File.
- You can choose the card type to add. If a credit card is added, customers can then use the credit card as a way to track rewards (this is optional).
- Input the Card #, Exp Date, and Zip Code.
- Click Save.
From the 1stPayPOS App:
The option to add gift cards to a Loyalty customer without leaving the 1stPayPOS app will not be used since gift cards will not be offered to loyalty.
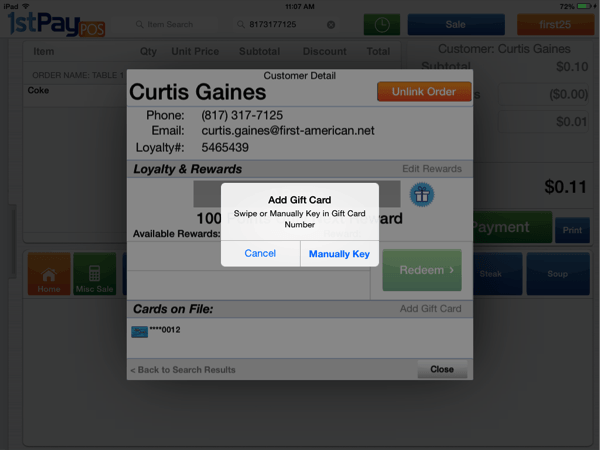
- After searching for a Loyalty Customer and pulling up their Customer Detail Screen, click on Add Gift Card
- A pop-up will display, allowing you to either swipe the gift/credit card or manually key in the card.
- The gift card appears in the Cards on File section.
Editing Rewards
You may edit the Loyalty Balance and Available Rewards for your customers.
From the Product Hub:
- First, go to the Product Hub. If using a computer, go to this site, select Transaction Center and enter your login credentials. If in the 1stPayPOS app, tap the tab on the left to open the menu, and select Go to Product Hub.
- In the Product Hub, select Gift Cards & Loyalty
- The customers page will be displayed. Click the Edit button next to the customer whose rewards you'd like to edit.
- Click Rewards to expand the section. The customer's rewards are displayed.
- Click Edit Rewards.
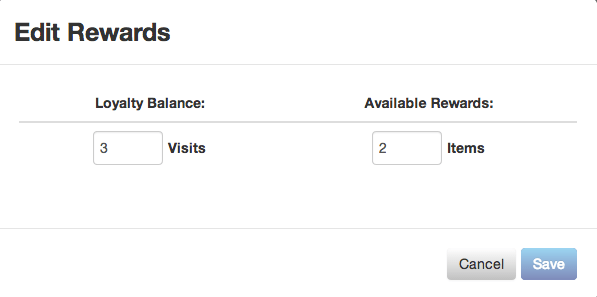
- The Edit Rewards box pops up. The Loyalty Balance (points or visits) and Available Rewards can be adjusted. Enter the changes you'd like to make.
- Click Save.
From the 1stPayPOS App:
- From within the 1stPay app, tap Loyalty Search at the top of the page next to the time clock.
- Type in the customer name or customer phone number. Tap Search.
- The customer's Loyalty Summary pops up, displaying their rewards. Tap the customer's name.
- A more detailed view of their rewards appears. Tap Edit Rewards.
- If the user doesn't have access to edit rewards, they will get a "Manager Override" prompt, asking for the manager to enter their PIN.
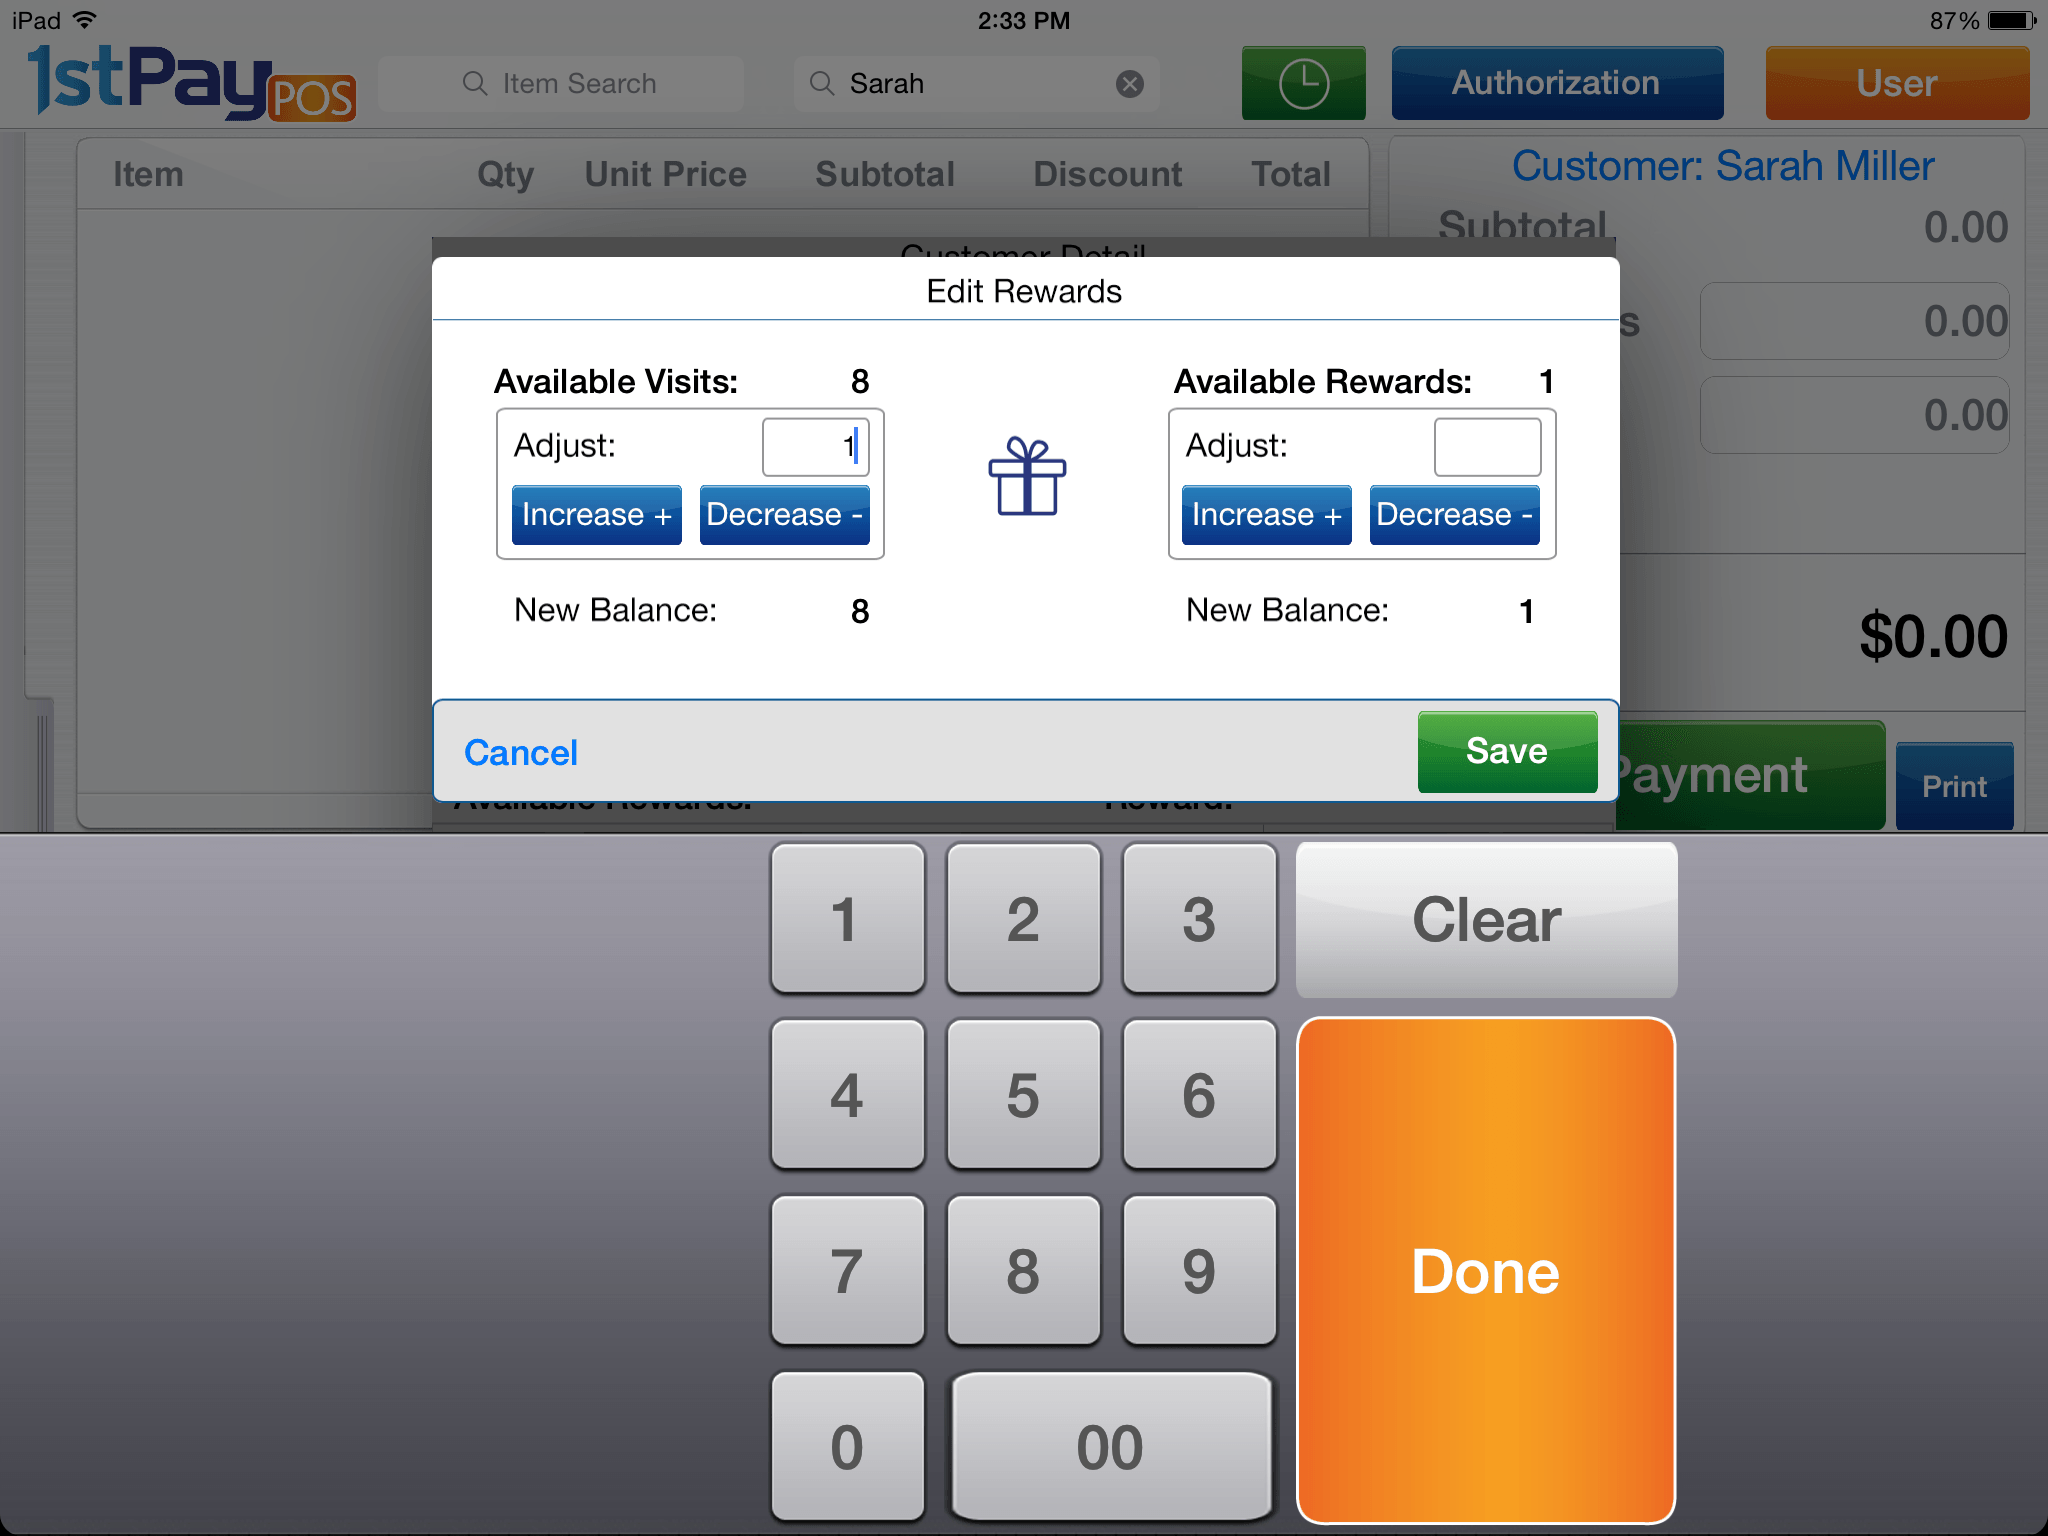
- The Edit Rewards box pops up. The Available Visits or Available Points and Available Rewards can be adjusted by entering the number you'd like to add or subtract, and then tapping the corresponding Increase or Decrease button.
- Tap Save.
Viewing Loyalty Customers' Transactions
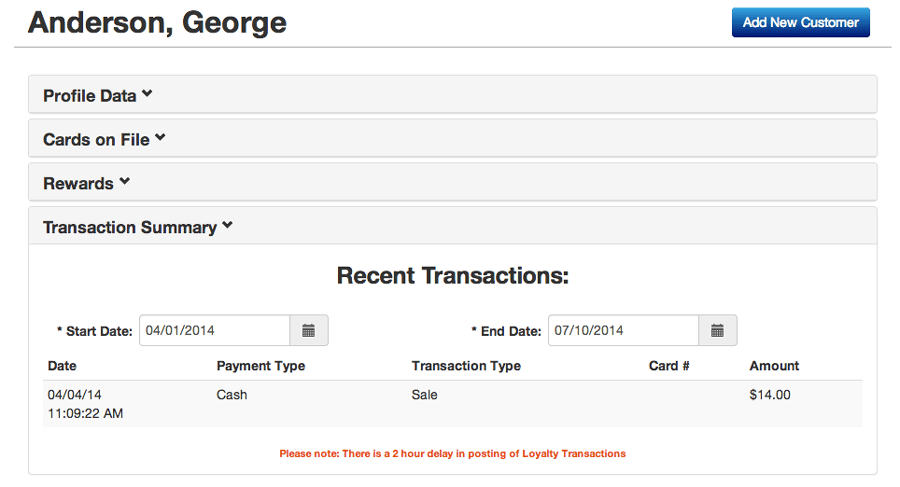
Transaction Summary is an easy way to track purchases made by a Loyalty Customer. It is not editable, and it doesn't give a breakdown of the items on the ticket.
- First, go to the Product Hub. If using a computer, go to this site, select Transaction Center and enter your login credentials. If in the 1stPayPOS app, tap the tab on the left to open the menu, and select Go to Product Hub.
- In the Product Hub, select Gift Cards & Loyalty
- The customers page will be displayed. Click the Edit button next to the customer whose transactions you'd like to view.
- Click Transaction Summary to expand the section. The customer's transactions are displayed.
Viewing a Loyalty Customer in 1stPayPOS App
- From within the 1stPayPOS app, tap Loyalty Search at the top of the screen next to the Time Clock button.
- Type in the customer name or customer phone number.
- Tap Search.
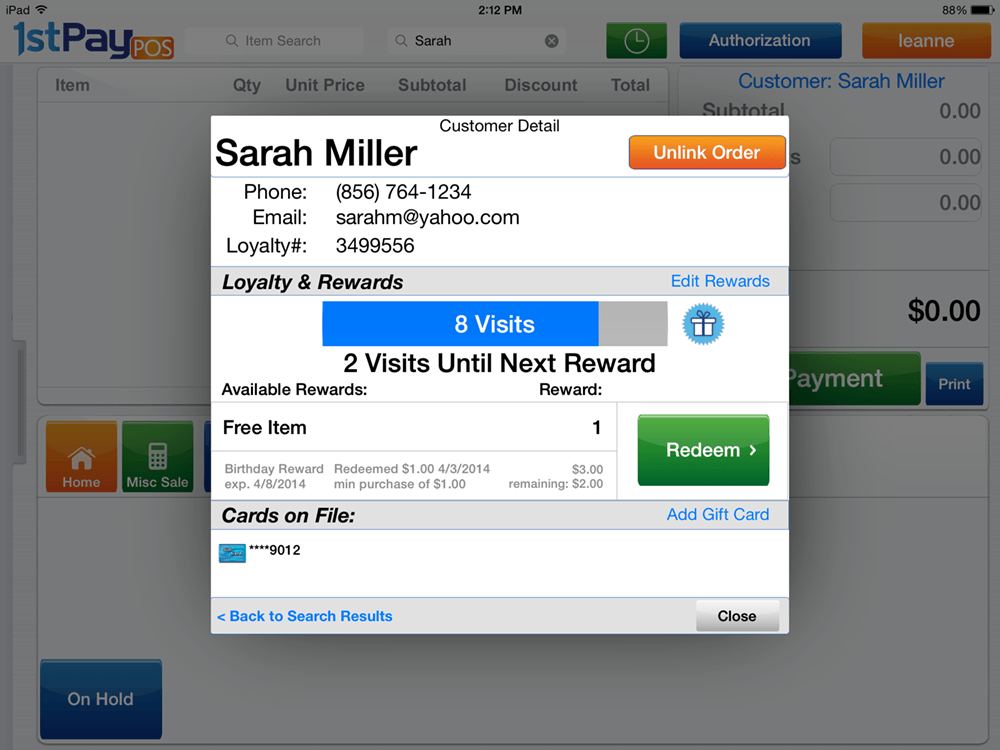
- The Loyalty Customer pops up and displays their rewards. Tap the customer's name.
- A more detailed view of the customer's rewards appears.
