1stPayPOS Support
Send Items to Kitchen Printer
Sending Items to the Kitchen Printer
The merchant can send items to the kitchen printer, to control when items are prepared and sent to guests.
- From the app, tap the Print button.
- In the menu that appears, select Send Items.
- Enter the Order Name or Table & and the number of guests.
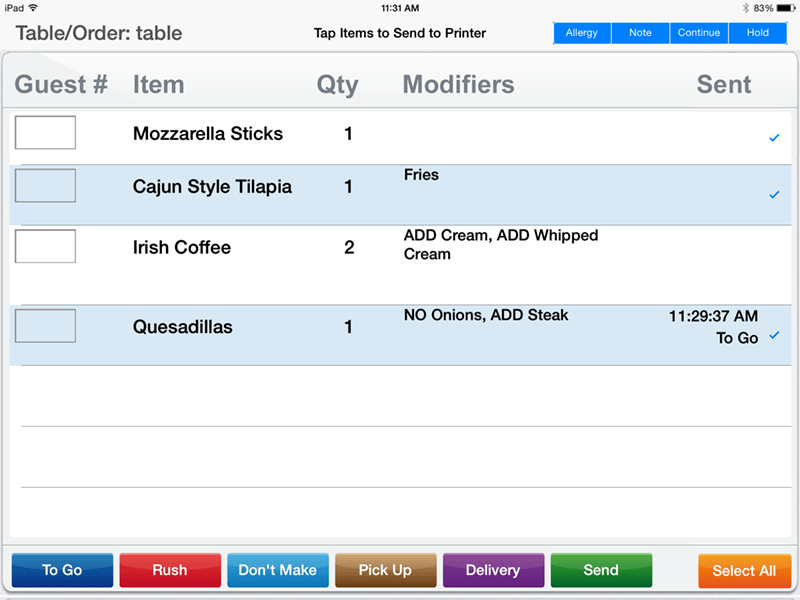
- A list will appear with items from the ticket. The merchant must tap the row of every item that is being sent to the kitchen printer.
- You have the ability to designate a Guest & for each item, simply enter the number in the Guest & column.
- The merchant must select a Send to Printer option from the bottom of the page. This includes kitchen instructions such as Rush, To Go, Delivery, Pickup, and more.
- If you'd like to designate a food allergy, tap Allergy at the top right. A box will appear that will let you enter the allergy, and hit OK.
- You may also add a note to the item. To do so, tap Note in the top right, and enter the note in the box that appears. Then tap OK.
- When all items have all the proper information noted and are checked off, tap the Send button. The word Send and the time sent should appear in the Sent column.
- When finished, you may press either Continue or Hold in the top right menu to either put the order on hold, or continue back to the main app screen and edit the order.

