Buy-Me Buttons Support
Invoices
Generate an Invoice for a Transaction
To view an invoice for a transaction(s):
- Log into the Management Console here
- Select Invoices
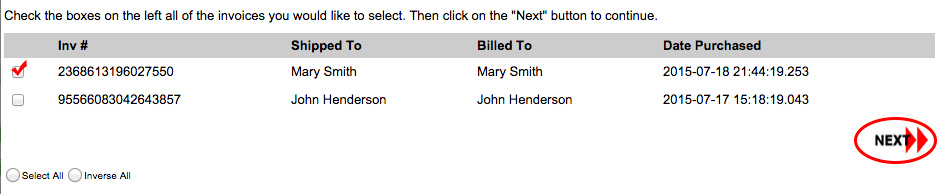
- You can locate the invoice using the Order ID, customer name or email address, billing or shipping address, or by the date of the transaction. Select the search criteria you'd like to use, enter the respective criteria (if searching by email address, enter the email address)
- Click Next.
- A list of invoices that match your search criteria will display. Click the checkbox in the row of the invoice you'd like to view and click Next.
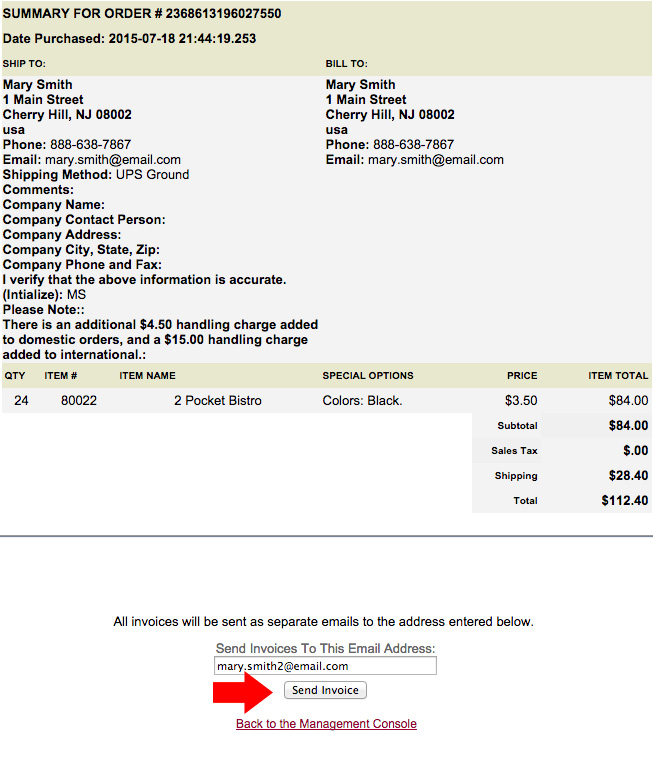
- Your selected invoice will display. You may use your browser's print function or enter an email address in the 'Send Invoices to this Email Address' field and click Send Invoice.
- You can either close this page or click Back to the Management Console to return to the home screen.
Edit Invoice Format
To change the format of invoices:
- Log into the Management Console here
- Select Internet Store
- Select Modify My Existing Setup.
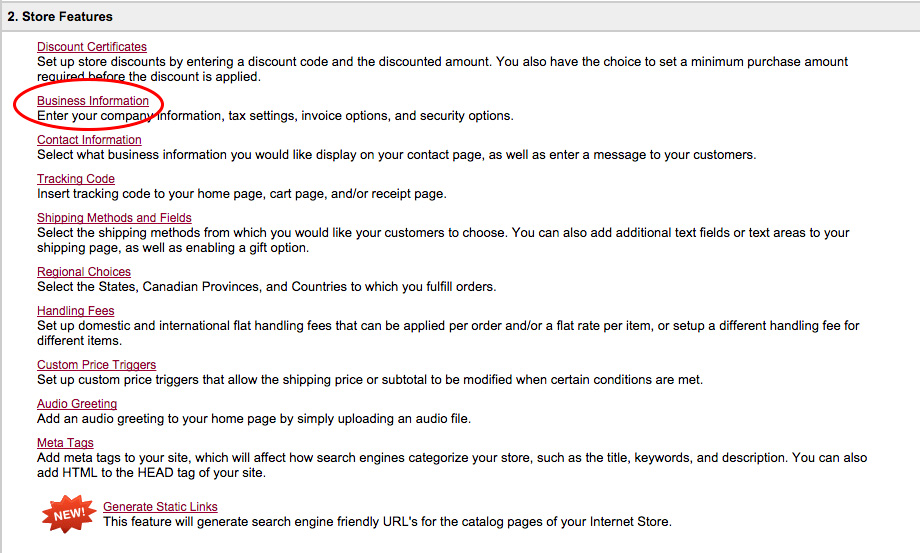
- In the Store Features section, click Business Information.
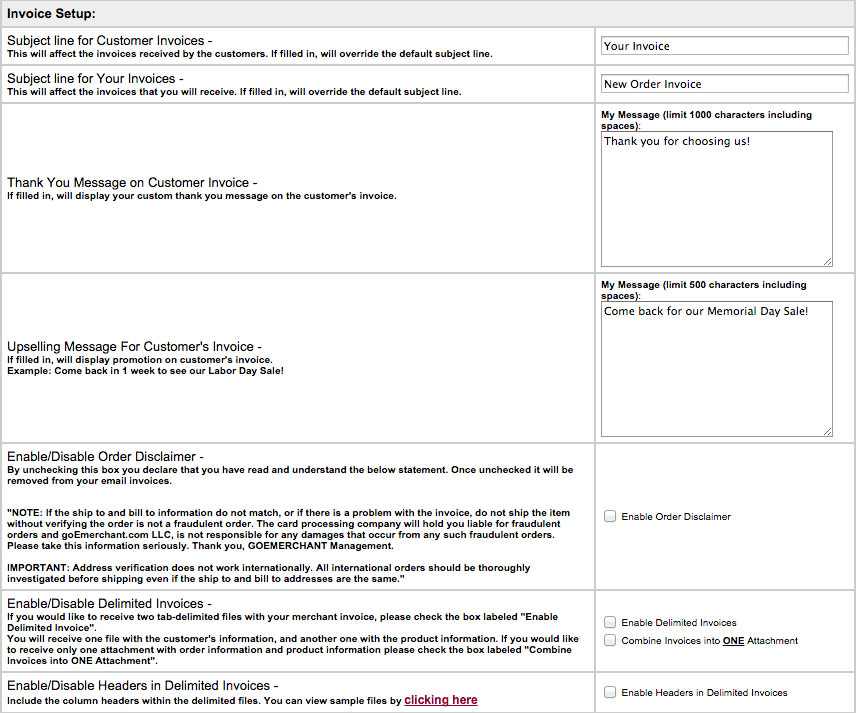
- Scroll to the 'Invoice Setup' Section and configure the desired fields:
- Subject line for Customer Invoices allows you to set the subject line on invoice emails received by customers
- Subject line for Your Invoices allows you to set the subject line on invoice emails sent to you
- Thank You Message on Customer Invoice allows you to enter a custom thank you message that will display on the invoice
- Upselling Message for Customer's Invoice allows you to enter a custom upsell message that will display on the customer invoices
- Enable/Disable Order Disclaimer This field is automatically enabled upon store setup. It is meant to give you as the merchant warning that 1stPayGateway is not responsible for the approval of suspicious or possibly fraudulent orders where the ship to and bill to information does not match. After you have read the disclaimer, uncheck this box so that the message will not appear in customer invoices.
- Enable/Disable Delimited Invoices If you would like to receive 2 separate tab-delimited files containing the customer's information on one and product information on another, check the box next to Enable Delimited Invoices. If you'd like to receive only one, check the box next to Combine Invoices into ONE Attachment.
- Choose Delimited Format allows you to select the format of your invoices. Formats available include pipe-delimited, tab-delimited, hash/pound-delimited, or comma-delimited
- InterOffice Invoice ID Label allows you to define an invoice field for internal use such as reference numbers, interoffice invoice IDs, etc. In the InterOffice Invoice ID Number and Number in Email Subject Line, you can define the starting number of the InterOffice ID and include the ID at the end of the subject line for merchant invoice emails.
- When all desired changes are made, click Next.
- On internet store home screen, click Go Live! to make your changes live.