Payment Gateway Support
Authorize.Net Emulator Quick Start Guide
The Authorize.Net Emulator allows merchants to use the Authorize.Net payment module that is available in most third party shopping carts. Simply change the 'POST TO' URL within the Authorize.Net payment module to point to 1stpaygateway's gateway and your account will be up and running within minutes.
Instructions
Locate the Authorize.Net Aim Payment Module in your shopping cart and change the 'POST TO' URL: FROM: https://secure.authorize.net/gateway/transact.dll TO: https://secure.1stpaygateway.net/secure/gateway/aegateway.aspx
- Authorize.Net API login = Your Transaction Center ID (Issued by 1stpaygateway)
- Authorize.Net Transaction Key = Your Gateway ID (Issued by 1stpaygateway)
- MD5 Hash = Your Transaction Center ID (Issued by 1stpaygateway)
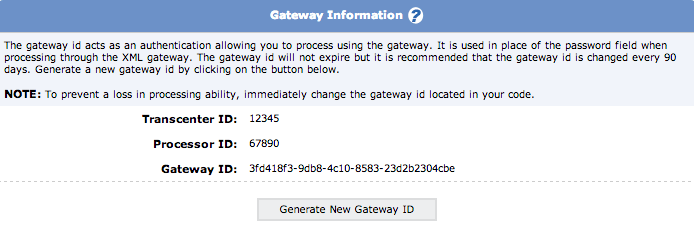
You can find your Transaction Center ID and Gateway ID in your Transaction Center in Security Settings Gateway Options.
Examples
The examples provided here are for several popular third party shopping carts that are integrated with Authorize.Net. The instructions below will show how quickly and easily you can set up the Authorize.Net Emulator to work with your third party shopping cart.
Magento
- Login to the Magento Admin Panel.
- Across the top are 9 tabs. Hover over the "System" tab and select "Configuration" from the pull-down menu.
- Under the "SALES" tab, click "Payment Methods".
- Go to the "Authorize.Net" pull-down menu. Make sure this is enabled.
- For "API Login ID", enter your Transaction Center ID.
- For "Transaction Key", enter your Gateway ID. (You can find this in your Transaction Center in Security Settings Gateway Options.)
- Make sure the Authorize.Net payment module is not in "Test" mode; otherwise orders will only seem successful.
- For "Gateway URL" use the following: https://secure.1stpaygateway.net/secure/gateway/aegateway.aspx
- Select the credit card types you will be accepting.
- Click the "Save Config" button in the top right hand corner of your browser.
OpenCart
- Modify the existing Authorize.Net payment module located at: /catalog/controller/payment/authorizenet_aim.php
- Change the 'POST TO' URL:
FROM: https://secure.authorize.net/gateway/transact.dll
TO: https://secure.1stpaygateway.net/secure/gateway/aegateway.aspx - Login to the OpenCart Admin Console.
- Across the top are 7 tabs. Hover over the "Extensions" tab and select "Payments" from the pull-down menu.
- Under "Payment Method", enable the "Authorize.Net AIM" payment module.
- For "Login ID", enter your Transaction Center ID.
- For "Transaction Key", enter your Gateway ID. (You can find this in your Transaction Center in Security Settings Gateway Options.)
- "MD5Hash" is optional. For "MD5Hash", enter your Transaction Center ID.
- Select "Live" for "Transaction Server" and "Transaction Mode".
- Set "Status" to "Enabled".
ShopSite
- Go into the store data folder.
- Modify the anet.aa file
FROM: ANET_ACGI: /gateway/transact.dll
TO: ANET_ACGI: /secure/gateway/aegateway.aspx - For "API Log In", enter your Transaction Center ID.
- For "Transaction Key", enter your Gateway ID. (You can find this in your Transaction Center in Security Settings Gateway Options.)
VirtueMart
- Log into the Joomla Admin Panel.
- Hover over the "Components" tab and select "VirtueMart".
- On the left-side menu, go to "Store" "List Payment Methods".
- Click on "Credit Card" "AN".
- Click on the "Configuration" tab. Make sure this is enabled.
- For "Authorize.Net Server Hostname", change to "secure.1stpaygateway.com".
- For "Authorize.Net API Login ID", enter your Transaction Center ID.
- To set up the Transaction Key, click on "Show / Change the Transaction Key".
- Enter your Joomla Administrator Password and click "Continue".
- For "Current Transaction Key", enter your Gateway ID. (You can find this in your Transaction Center in Security Settings Gateway Options.)
- Type in your Joomla Administrator Password again and click "Submit".
- Click the "Save" button in the top right hand corner of your browser.
- Modify the existing Authorize.Net payment module located at: /administrator/components/com_virtuemart/classes/payment/ps_authorize.php
On lines 398 and 636 in ps_authorize.php, change the 'POST TO' URL:
FROM: $result = vmConnector::handleCommunication( "https://$host:443/gateway/transact.dll", $poststring );
TO: $result = vmConnector::handleCommunication( "https://$host:443/secure/gateway/aegateway.aspx", $poststring );
WordPress + Shopp
- Modify the existing Authorize.Net Payment Module located at: opencart/catalog/controller/payment/authorizenet_aim.php
On lines 20 & 21 in authorizenet_aim.php, change the 'POST TO' URL:
FROM: $url = 'https://secure.authorize.net/gateway/transact.dll'
TO: $url = 'https://secure.1stpaygateway.net/secure/gateway/aegateway.aspx - Log into your WordPress Admin Console and enable "Authorize.Net" in your Shopp plugin.
- For "API Log In", enter your Transaction Center ID.
- For "Transaction Key", enter your Gateway ID. (You can find this in your Transaction Center in Security Settings Gateway Options.)
Zen Cart
- Modify the existing Authorize.Net payment module located at: /includes/modules/payment/authorizenet_aim.php On line 521 in authorizenet_aim.php, change the 'POST TO' URL:
FROM: $url = 'https://secure.authorize.net/gateway/transact.dll'
TO: $url = 'https://secure.1stpaygateway.net/secure/gateway/aegateway.aspx' - Log into your Zen Cart Admin Console.
- Under "Modules" "Payment", enable the "Authorize.Net AIM" payment module.
- For "API Log In", enter your Transaction Center ID.
- For "Transaction Key", enter your Gateway ID. (You can find this in your Transaction Center in Security Settings Gateway Options.)
- For "MD5 hash", enter your Transaction Center ID.