Transaction Center & VPOS Support
ACH Categories
Deleting an ACH Category
- From www.1stpaygateway.net, click Sign In at the top right corner.
- Select Transaction Center, or log into the Transaction Center directly from here.
- Enter in the Transaction Center ID, Username and Password.
- You will be brought to the Product Hub. Select Transaction Center.
- If your account is Multi-MID, you will be presented with a dropdown that allows you to select a MID to access. Select your ACH MID and click Submit.
- In the top menu, hover over Main Options, and select ACH Settings
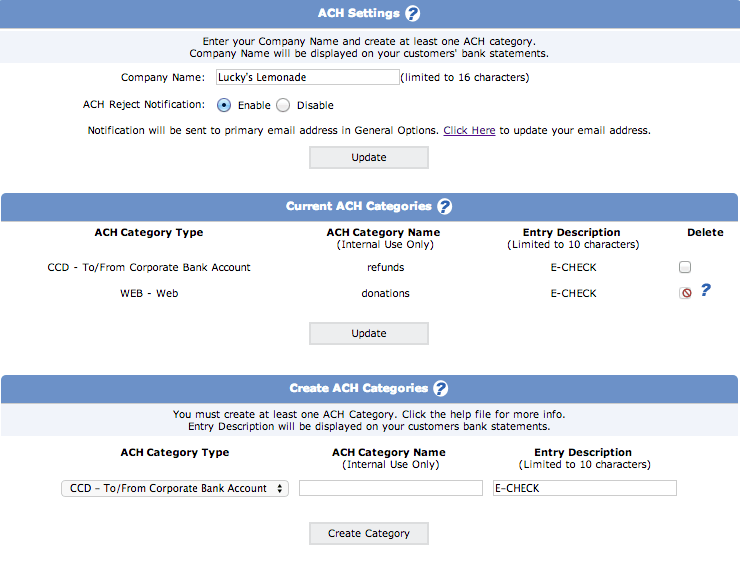
- In the Current ACH Categories Section, there are three columns:
- ACH Category Type
- ACH Category Name
- Entry Description
- Under the DELETE column, click on the checkbox next to the ACH Category you'd like to delete.
- Click the Update button. The webpage will refresh and the ACH Category will no longer display under the Current ACH Categories.
ACH Categories that cannot be DELETED
STOP HERE/READ: Before Deleting any ACH Categories, first see if there are any ACH Category Types that have recurring transactions. If recurring transactions exist, the delete column will display a QUESTION MARK ICON. When clicking on the QUESTION MARK ICON, a message will appear noting that the category has pending transactions or recurring transactions scheduled.
- Until all transactions under that ACH Category are final or voided, you will NOT be able to delete the ACH Category
- If there are recurring transactions in this ACH category and you can successfully void ALL ACH transactions, then and only then can you delete the ACH category.
Create an ACH Category
- Log into the Transaction Center here.
- Go to Main Options ACH Settings
- In the Create ACH Categories section, there will be 3 boxes. From the dropdown box in the ACH Category Type column, select the category type you'd like for your new ACH Category
- In the ACH Category Name column, enter a name for the category. This will only be seen internally
- In the Entry Description column, enter a description for the category. This must be less than 10 characters in length
- Click the Create Category button
