Transaction Center & VPOS Support
Block IP Address
You may block an IP address for a particular customer in the Transaction Center if you wish. This can be useful if you suspect fraudulent charges coming from a specific IP address.
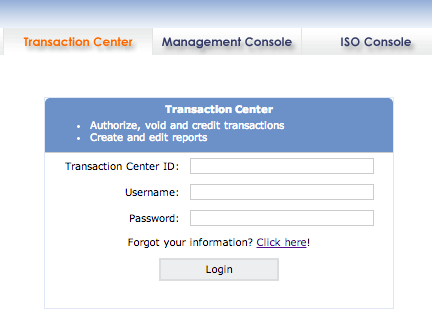
Step 1: Logging In
- Visit this page
- Select Transaction Center
- Enter in your Transaction Center ID
- Enter Username
- Enter account Password
- Click Login
- On the Product Hub, select Transaction Center
- If your account is Multi-MID, select the appropriate MID and click Submit
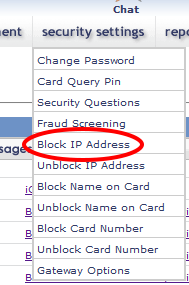
Step 2: Block IP Address
- Hover over the Security Settings Tab
- Click on Block IP Address
- Enter the IP address you wish to block. If you are only blocking a single address, the last text field can be left blank; if you are blocking a group of IP addresses, the second to last text field would specify what the start block address is and the last text field would specify the end block address. For example, if you wanted all addresses starting with 192.168.1 to be blocked you would set 192 - 168 - 1 - 1 - 254. See image below.
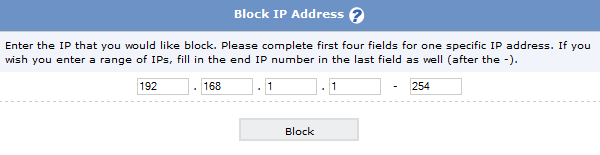
- Click Block.
NOTE: Verify the address before you block it. If you block an IP address and attempt to run transactions from that address, the system will give a Decline message.
Step 3: Unblocking an IP Address
- Hover over the Security Settings Tab
- Click Unblock IP Address
- Leave the default search option of All IPs and click Search OR Select a Specific IP Address from the dropdown menu, enter the address to search for, and click Search.
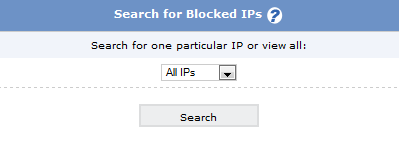
- You will be presented with the IP(s) matching the search.
- Check the boxes under the Unblock column next to the IP addresses you wish to unblock

- Click Unblock
- You will be presented with a message that the addresses were unblocked successfully.
