Transaction Center & VPOS Support
Receipt Options
You have the ability to print or email a receipt for any transaction located in the transaction center. However, you will be unable to do so until you set your receipt options inside your transaction center.
Location of Receipt Options
Log into your transaction center and navigate to Main Options (your account type) Receipt Options.
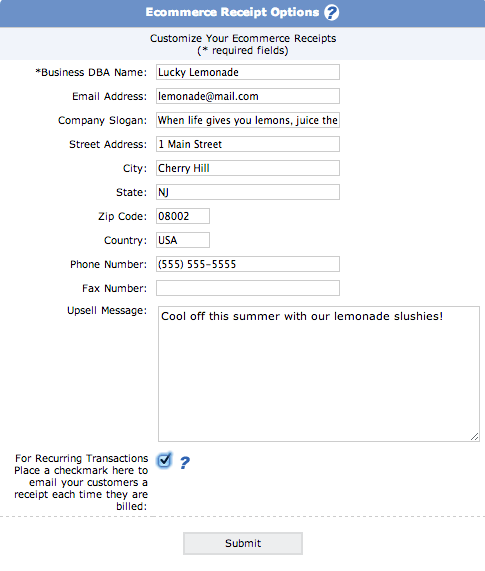
Company Receipt Options
The following fields must be populated in order for you to be able to send invoices via the transaction center.
Required Fields:
- Business DBA Name: Enter the name of your business.
- Email Address: Enter the email address from which any transaction center receipts will be sent. This will be the reply-to email address to which your customers will respond if they have any questions regarding their order.
Optional Fields:
The following fields will show on each invoice sent, if populated:
- Company Slogan: Enter a company slogan, if you have one.
- Street Address, City, State, Zip Code, Country: Enter the address of your business
- Phone Number and Fax Number: Enter your company's phone and/or fax numbers
- Upsell Message: You can use this field to enter any additional information you would like to show on the invoice. This could be shipping information, an upsell message, or simply "Thank you for your order!"
- Email Receipt: There is a check box next to 'For Recurring Transactions: Place a checkmark here to email your customers a receipt each time they are billed'. Enable this option if you want your customers to receive an email notification when their recurring payment is processed. This receipt can only be sent if the customer's email address was submitted with the original transaction.
- Click Submit when all desired fields are completed.
Sending a Receipt from the Transaction Center
- Inside your transaction center, navigate to Virtual Terminal Search Transactions
- Enter in any search criteria you wish, and click Begin Search
- On the Search Results screen, you will see three icons next to each transaction listed:
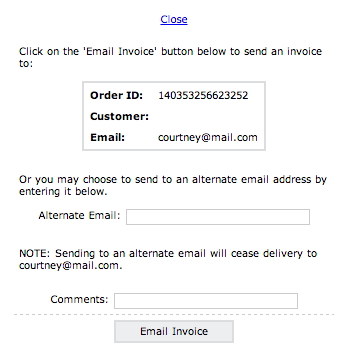
- Click the envelope icon to send an emailed receipt to your customer. A small screen will pop up, giving you the choice to send the receiopt to the email address already in the transaction details, or to another address. To send to the address already in the transaction record, click Email Invoice. If you want to send to a different email address, type the new address in the field marked Alternate Email: and click Email Invoice.
NOTE: If you choose to send the invoice to another email address, the invoice will NOT be sent to the address in the transaction record. If you want to send multiple copies of the invoice, you must send each individually
- Click the print icon to print an invoice. A new screen will pop up, showing a preview of the printed invoice. The print dialog box will also open automatically. Select any printing options you'd like and click Print.
TIP: If the print dialog box does not open automatically, hit ctrl+P to open this box.
Retail Receipt Options (Retail Account Types Only)
Paper Size: Select your receipt paper size from the dropdown menu. This allows you to choose 8.5 x 11 for a regular-sized computer printer, as well as 2" and 3.5" for receipt printers.
Receipt Options: Select whether you'd like to automatically print 1 or 2 copies of each receipt. Settings two copies does not affect printer settings; it sends 2 copies of the same receipt per 1 print job.
NOTE: If you would like to print receipts automatically you will need to refer to the following. Retail Receipts MUST be configured prior to running any retail transactions.
Hide Print Dialog Box- *Internet Explorer Users only. By checking the Internet Explorer button for printing without a print dialog, you acknowledge that you have read these terms and conditions and are aware that settings must be made to the browser that will lower its security strength. By accepting these terms, you agree to add https://secure.1stpaygateway.net to the trusted sites list of Internet Explorer. You also agree that you will change the security setting to Low in the trusted sites list. These changes must be made in order to automatically print receipts without a print dialog box opening.
NOTE: This option only applies to Internet Explorer users.
