Transaction Center & VPOS Support
Run a Transaction
Authorize Transaction
- Log in to the transaction center.
- Select Virtual Terminal from the menu and select "Authorize eCommerce/MOTO/Retail Transaction"
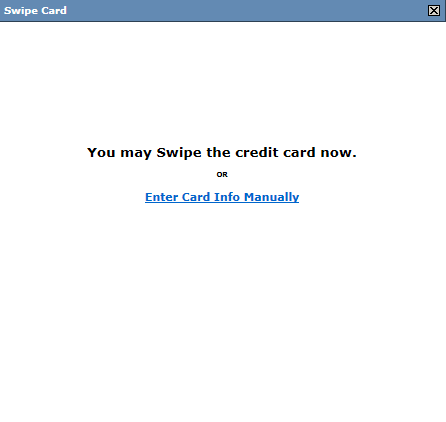
- If the account is a Retail account, you will see a message, "You may Swipe the credit card now. Or Enter Card Info Manually"
- Provided your swiper is installed and working, swiping the card should fill in most of the information for the card.
If you do not have a swiper or are entering manually, you will be presented with the following fields:
Order Information
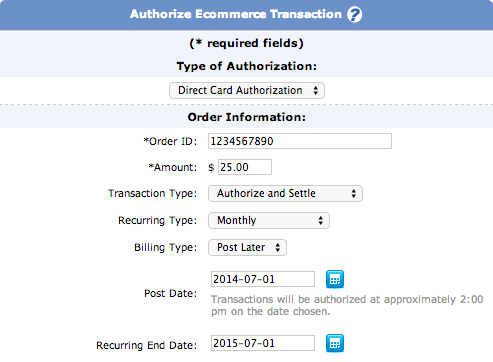
Type of Authorization:
This should be set to Direct Card Authorization. You would only use Voice Authorization when a card must be manually pushed through with extra security, and requires a voice authorization.
Order ID (Required):
This identifies the transaction. It must be unique. If you have a Retail account, you can have order IDs generated automatically in Main Options > General Options.
Amount (required):
Amount the transaction is for
Transaction Type:
This determines the type of transaction you are running.
- Authorize and Settle: Verify card can run the transaction, submit for settlement with the next batch
- Authorize Only: Verify card can run the transaction (card is valid and accepts amount provided)
- Account Verification Only: Verify card is valid (will not check the amount nor run the card for it)
- Credit/Refund: This option only appears for Retail MIDs. Use this to issue a credit to a customer's card
Recurring Type:
This determines whether or not the transaction will be set as recurring. The default is None, which means this transaction will run only once. Other available options include:
- Daily
- Weekly
- Bi-Weekly
- Every Three Weeks
- Monthly
- Every Other Month
- Quarterly
- Semi-annually
- Annually
When recurring is set, it will run at the frequency you select starting from the day you run the original transaction. So if, for example, a transaction was set to recur monthly and it was run on January 14th, it will run again next month on February 14th.
Assuming the Billing Type is set to "Post Now", this will be the same day the transaction recurs. For more information about this, see billing type below.
The post date can be changed in the future but it is highly recommended that this is not done close to when a transaction is set to recur as it may cause problems when the customer is being charged.
Billing Type:
This determines when this transaction is submitted. The default is Post Now, which means the transaction will submit with the next batch. If Post Later is selected, then the transaction will submit with the next batch on the date specified.
If this is selected, you may have difficulties changing the transaction! The more that is changed with a transaction that is scheduled in the future, the higher the probability something will go wrong.
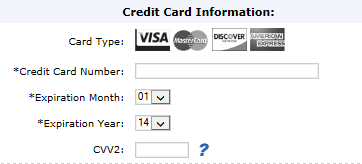
Credit Card Information
A transaction requires a credit card number, expiration month, and expiration year. Upon entering a valid card number the logo of the card type will light up. CVV2 is optional, but recommended if you have it for the card you are running (so that the transaction is less likely to decline).
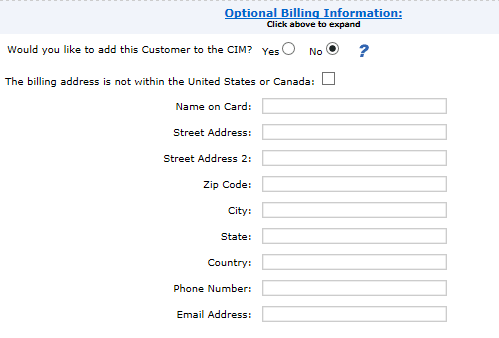
Optional Billing Information
Add customer to CIM: If 'Yes' is selected, the customer will automatically be entered into the CIM assuming they are not already. The system does not check customer name or information for duplicates, it only identifies whether there is a duplicate CIM reference number. The more fields entered for Billing information, the better. These fields are not strictly necessary for all merchants, but are recommended. If the email address is not entered, a receipt will not be emailed to the customer. A receipt can be manually emailed later if necessary.
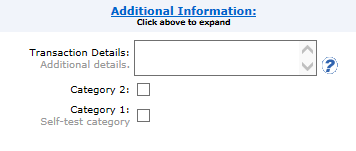
Additional Information
Any additional information set in Main Options > Additional Information will appear in this section. How these fields look is based on how they are set (see information in the Main Options article). Only the fields that were created and set as required will be required to complete the transaction.
If the Customer is Already in CIM
If you already have a CIM entry for a customer and you would like to make sure that a transaction is properly linked to that entry, you can do so as follows:
- From the CIM menu at the top of the Transaction Center, select "Manage Customers"
- Enter criteria for your search if necessary and click "Begin Search"
- When you have located the right customer, click on the magnifying glass icon to the left of the customer's reference number. This will pull up the details for the customer.
- Under the "Credit Card Information" section of the page, find the card you wish to run the transaction with and click the dollar sign icon.
This will start a transaction with the information from the CIM already filled in. This will also guarantee that the transaction matches with the customer. There is also a magnifying glass icon next to the card information. This will pull up a search for all transactions tied to this CIM entry. Running transactions from the CIM entry should guarantee that search results will display every transaction ran for that customer.