Payment Page Builder Support
General Settings Tab
Configuring General Settings
The General Options tab is the first area to set up on your payment page builder. Below will reflect what is available and how to use it.
- Enter in the Page Name to be used for your reference.
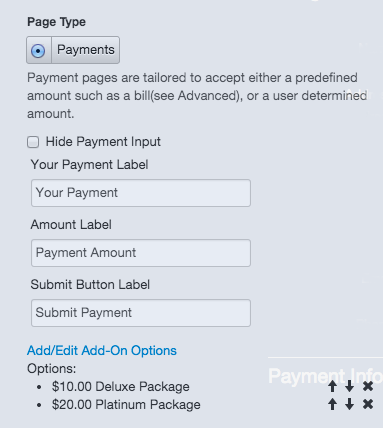
- Confirm your Page Type of either Payment or Donations.
- Payment Page: will allow customers to designate the amount they will pay. You can also configure a Payment Page to have a preset amount to be paid (see this article), and include add-on options that add an additional cost to the original amount. To define Add-On Options, click Add/Edit Add-On Options, and fill in the options in the popup box.
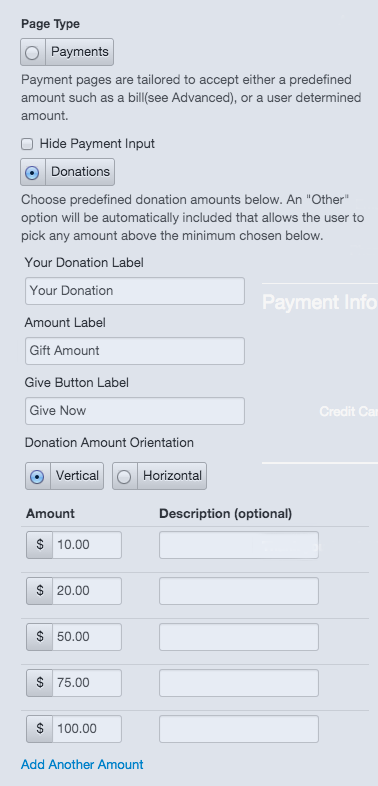
- Donation Page: will allow you to add preset amounts with a description next to each. Up to 15 preset amounts can be added. The placement of each amount can be changed to either vertical or horizontal.
- Payment Page: will allow customers to designate the amount they will pay. You can also configure a Payment Page to have a preset amount to be paid (see this article), and include add-on options that add an additional cost to the original amount. To define Add-On Options, click Add/Edit Add-On Options, and fill in the options in the popup box.
- Select your Page Style:
- Single Page: checkout page only. If you'd like your customers to be redirected to an external receipt page, enter the URL in the box labeled "URL for Receipt".
- Two Pages: checkout and results pages
- Three Pages: checkout, confirmation and results pages
- Configure your Payment Details. The credit card account should be set to the merchant account you wish to use your page with. Also, be sure to designate whether you wish to accept eChecks with an ACH account.
- If there is a minimum amount you accept, designate that in the Minimum Amount Accepted textbox.
Configuring Messages
All messages are optional. You may use the editor to format text, add images & links, and create tables.
- Add an Introduction Message to be shown on the checkout page.
- Add an Approval Message to be shown on the result page.
- Add a Decline Message to show on the result page.
Definitions of Message Editor Icons
- Anchor: A web link that will only work in a word document to be viewed on a computer
- Image: You can add an image by browsing for a file from your computer that is 25 MB or under. The appearance can be modified by using alignment, dimensions and advanced options as well.
- Text Color: If you click on the "A" it will bring up a color palette for your selection.
- Background Text Color: When clicking on the highlighter it will bring up a color pallette for your selection.
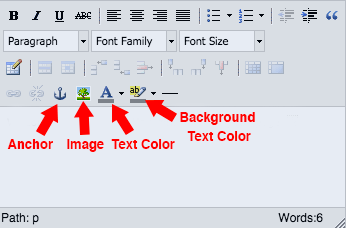
NOTE: When highlighting your mouse over the icon, it will reflect the icon description.
Miscellaneous Options
Requirement and Display Options
Checkmark each of the following options if you'd like them to apply to your page:
- Require Email Address
- Require Phone Number
- Require CVV2
- Display Full Name as One Field
- Send Receipt on Approval (if you select this, enter the following for the Receipt Email under Custom Email Text: Subject, Top Message, and Bottom Message.
- Disable Zipcode Autofill
Recurring Frequency
This area allows you to give your customers payment or donation options to have a certain amount deducted from their account on a frequency.
- If "one time" is the only option selected, the customer will not have the ability to select multiple payments.
- If "one time" and other options are selected, the customer will have the ability to choose if they want to have an amount deducted on a frequency or not.
- If "one time" is not selected then the customer will only be billed on the frequency they select, and cannot make a one-time payment.
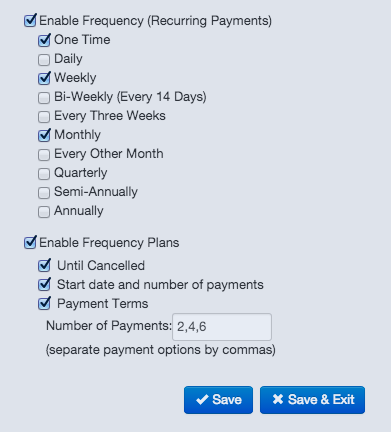
Recurring Frequency Plans
The Recurring Frequency Plans will give you the ability to provide your customers with even more recurring options if you wish to do so.
- If "Until Cancelled" is checked, your customer will be charged on the same frequency until they contact you to cancel their payments.
- The start date and number of payments option will allow you to provide your customer with the date that they wish to start the payment on, and how many payments they'd like to make
- Payment Terms provide you with the ability to add the number of payments in the selected frequency. For example: If monthly is selected and the payment terms are set to 2, 4 and 6 payments, the customer will have the ability to select whether to be billed monthly for 2, 4 or 6 payments.
NOTE: The dropdown box will only show the payment terms in the preview screen and not the store builder.
When you are finished configuring your payment page, click Save or Save & Exit if you'd like to exit the Payment Page Builder. You may edit these settings at any time.
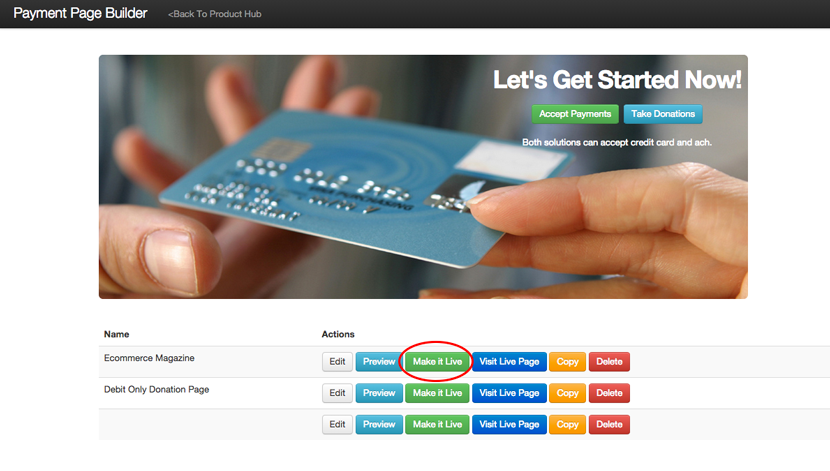
Making Your Page Live
When you are finished making changes, you must manually put your page live so that your changes are visible to the public. To do so:
- Click Save & Exit at the bottom of your Payment Page editor. You may also click Go Back in the top navigation.
- You will see all of your payment pages listed below the banner image. Next to the one you'd like to make live, click Make it Live.
- Your changes are now live! You may click Visit Live Page to see the live page.
- You may continue editing your page at any time.