QuickBooks Plugin Support
Plugin Installation
Step 1: Installing the QuickBooks Credit Card Processing Plugin
- From your Incoming Email account, open the Login Email that Technical Support sent you.
Note: If you don't see the email in your inbox, check the Spam Folder.
- From the Login Email, click on the Link QBPaymentPlugin.zip. A dialog window will open prompting you to Save or Open the file.
- Choose Save as, and save to your desktop.
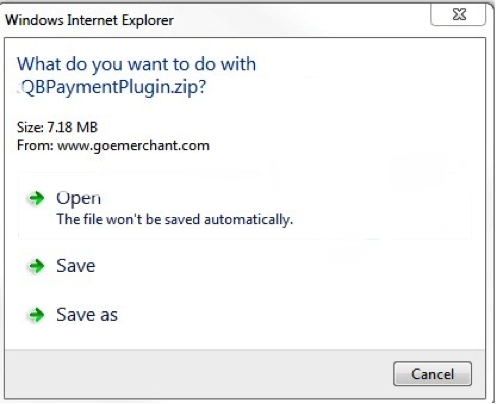
- Click Save.
- After the download is complete, go to your desktop and right click on the QBPaymentPlugin zip icon and select Extract all.
- A Windows popup Self Extractor will open. Select a location to which you would like to unzip the files (we recommend your Desktop) and click Unzip.
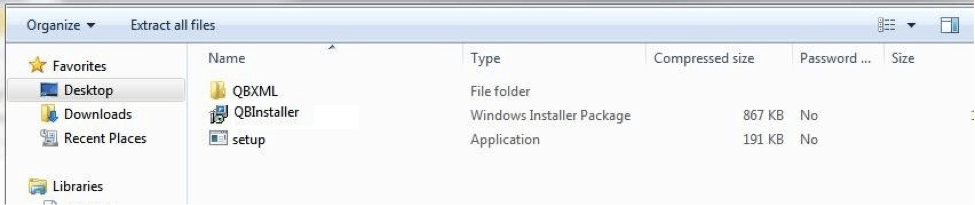
- After the Self-Extractor completes, you will see a new folder on your desktop called "Release."
- Double-click the 'Release' folder.
- From the "Release" folder, double-click on the "setup" file.
- A Security Warning Dialog may open asking permissions to run the installation. This means you must be logged in as the Administrator.
- Click on the Run Button.
Important Messages for Vista and Windows 7 and 8 Users:
If you get a pop-up called Quickbooks "Run-time error".
- Find the Quickbooks icon, and right click on it.
- Choose "Run as Administrator"
- Once at the Home Screen, Exit and restart the application normally.
Step 2: Configuring Preferences
- Open QuickBooks and log in as the Admin in single user mode.
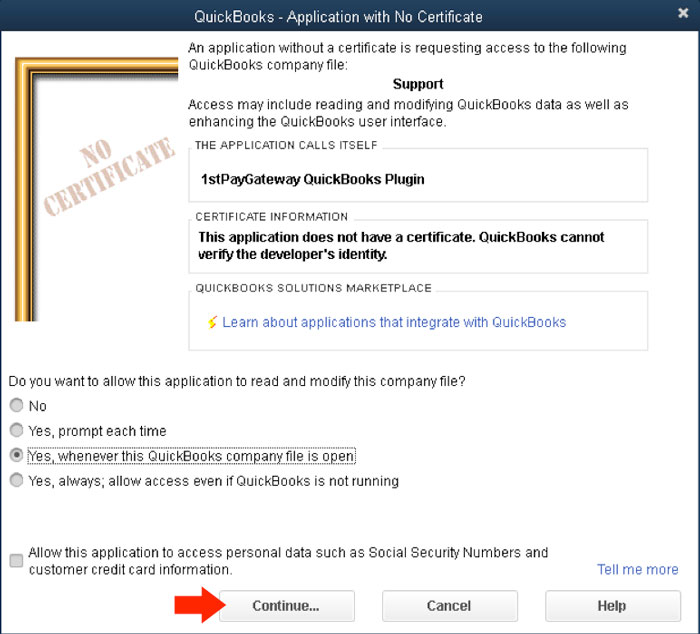
- When QuickBooks loads, you should see a prompt to give access to the Plug-in. Select "Yes, whenever this QuickBooks company file is open" and click Continue.
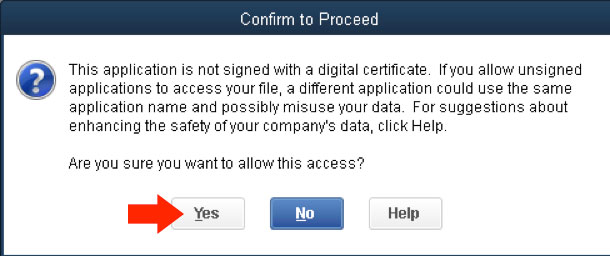
- A prompt will display to confirm whether you'd like to grant the application access. Click Yes.
- Within a few seconds the Plug-In preferences box will load. Sometimes it will load behind the QuickBooks program, so click the Blue, Red and Yellow icon in the bottom right of your screen in the Windows toolbar. The Plug-In preferences dialog box contains 5 tabs, be sure to complete all 5 tabs prior to clicking Save Settings.
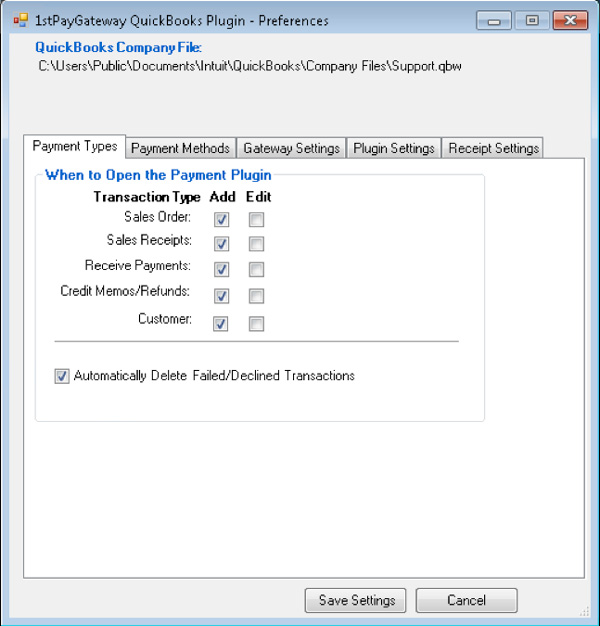
- In the Payment Types tab, have the Add column's box checked off for all accepted transaction types. Also, be sure to click the checkbox next to Automatically Delete Failed/Declined Transactions. This will automatically delete invoices for declined transactions.
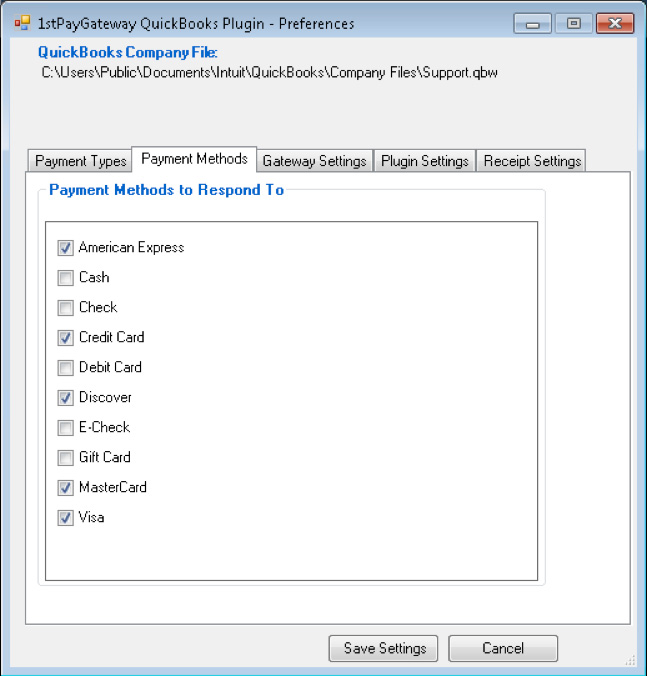
- Click the Payment Methods tab. Click the checkbox next to all of the payment methods you will be accepting. For most merchants, this will be American Express, Credit Card, Discover, MasterCard and Visa. If you have any custom payment methods set up they will also be displayed in this list and can be enabled with their corresponding checkbox.
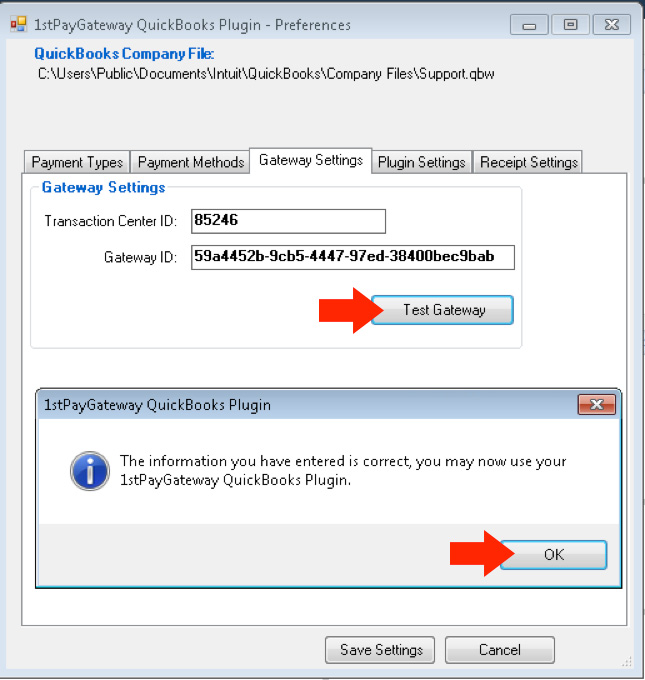
- Click the Gateway Settings tab. Enter your Transaction Center ID and Gateway ID in the corresponding textboxes. Both of these numbers can be found in your Transaction Center under Security Settings Gateway Options. Click Test Gateway. You should get a dialog box saying that the information was entered correctly. Click OK.If you copy and paste these numbers, make sure there are no spaces added at the end of either number. If you do not receive the successful information message, please ensure that you have entered the Transaction Center ID and Gateway ID correctly.
- Click the Plugin Settings tab. Click the checkbox next to the box that describes your account's processing capabilities such as Retail, eCommerce/MOTO, and ACH. If you have the CIM enabled on your account, check the box next to Enable CIM Storage. You should also check off the following boxes:
- Store Response in Memo Field
- Print Receipt if you'd like to be prompted to print a receipt after every transaction
- Enable ACH Processing if you support ACH. If so, enter your ACH Processor and ACH MID into the designated textboxes
If you're unsure about what your account supports, do not hesitate to contact Support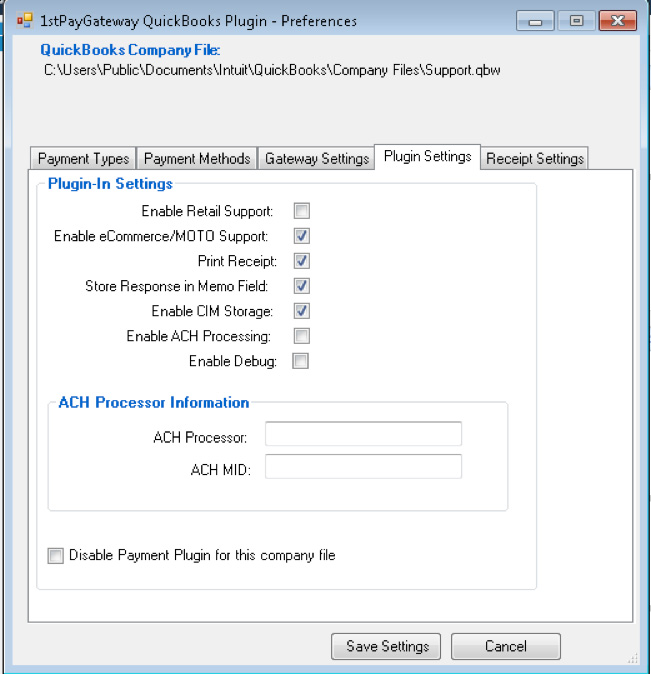
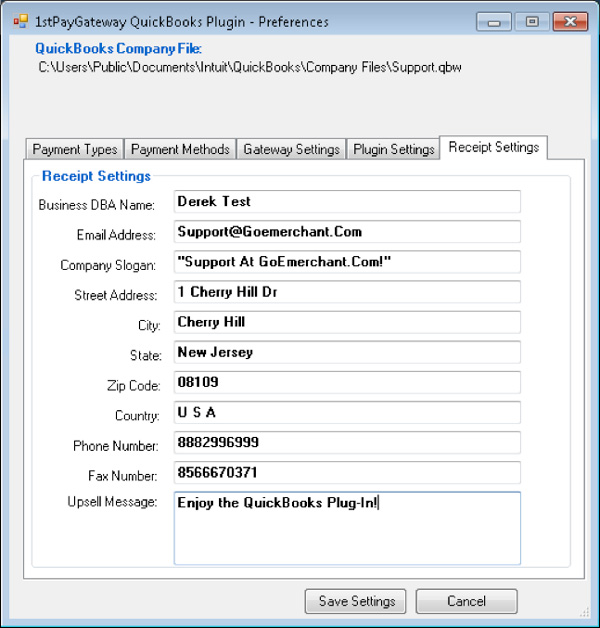
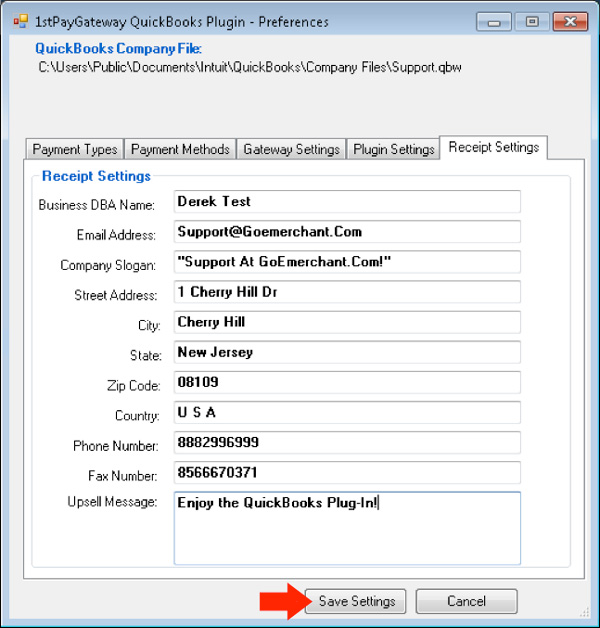
- Click the Receipt Settings tab. Enter the company information you'd like to include in each textbox.
- Once you have filled out all tabs, click Save Settings.
- Next, you'll want to run a test transaction to ensure that everything is running properly. To do so, please follow the instructions on running a transaction here using a $1.00 test transaction.
Compatible Versions of QuickBooks
The QuickBooks Plugin is not compatible with all versions of QuickBooks. Please ensure that your version of QuickBooks is on our compatibility list:
- QuickBooks Professional Editions
- QuickBooks Premier Editions
- QuickBooks Enterprise Editions