QuickBooks Plugin Support
Running a Transaction with the QuickBooks Plugin
Before Running a Transaction:
Before running a transaction with the QuickBooks Plugin, ensure that these steps have been completed:
- QuickBooks Plugin and QuickBooks is installed onto your computer. Preferences must also be configured. To see details on installation of the QuickBooks Plugin and Preferences configuration, see this article.
- Set up Sales Receipt or Receive Payments in QuickBooks
Performing a Transaction with the QuickBooks Plugin
- From your desktop, log into the QuickBooks Application.
- If desired, you may create an invoice for your transaction. Or you may create one from the Receive Payments screen.
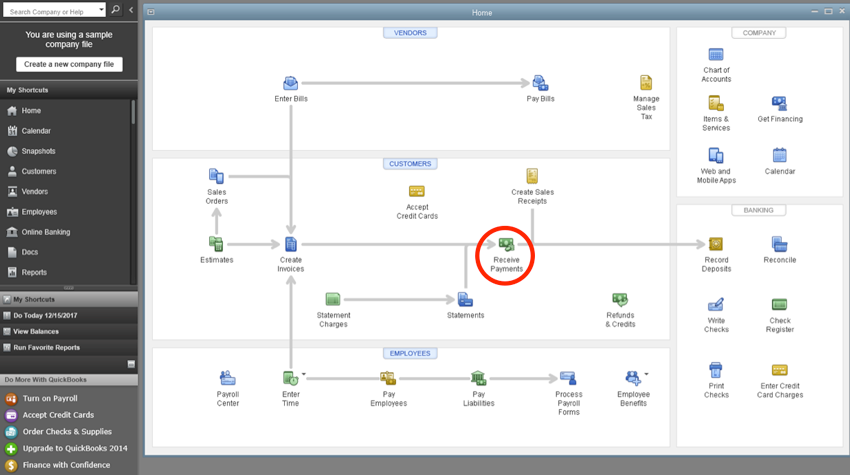
- Next, click Receive Payments.
- If you chose to create an invoice first, open the invoice you just created.
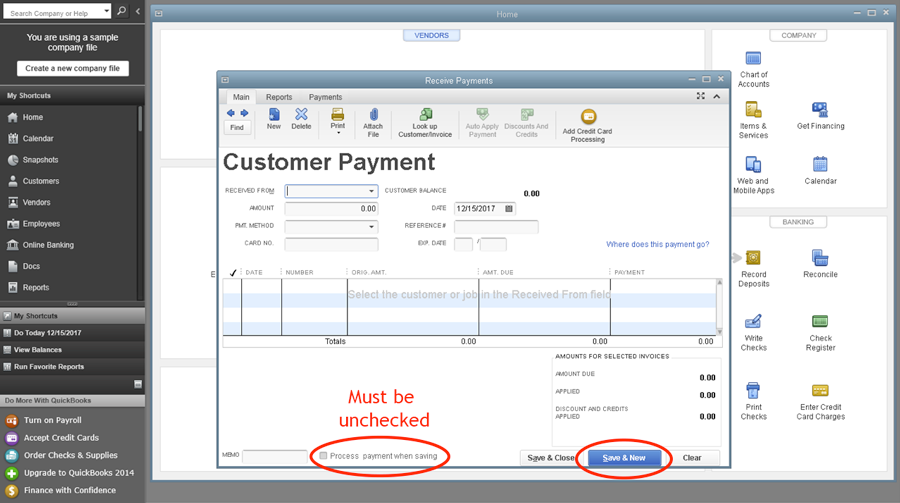
- The Customer Payment Dialog will display.
NOTE: At the bottom of the Dialog, make sure that "Process Payment when Saving" is not checked.
- If you created an invoice for this payment, click Save & Close. If you did not create an invoice prior to this step, click 'Save & New' Button.
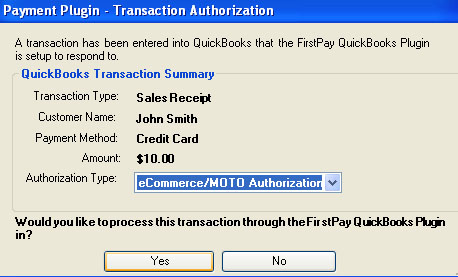
- Within a few seconds a dialog box will open asking if you'd like to process the transaction through the QuickBooks Plugin. Select the correct Authorization Type and click Yes.
Note: If you have a retail account, be sure to change the Authorization Type to 'Swiped Retail Transaction'. If the dialog box does not open, click the Blue, Red and Yellow icon in the bottom right of your screen in the Windows toolbar.
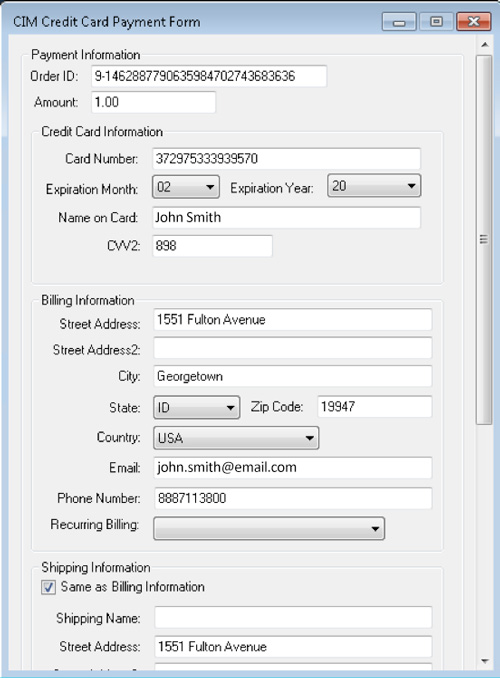
- The payment form will load and you are now ready to scan a credit card or enter manually. Fill in any missing billing and shipping information and click Submit.
- Your transaction will proccess and you will receive a result.