Shopping Cart Support
Store Settings
Many store settings can be configured from the Store Settings page. This can be reached from Settings General Store Settings in your Store Manager. Below is a reference of each setting located on this page, organized by section heading. When making changes, be sure to click Save Changes to put your edits into effect.
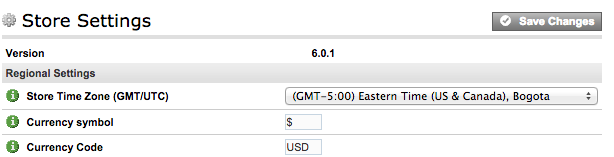
Regional Settings
- Store Time Zone (GMT/UTC): This is the time zone of your store. When viewing order invoices, the time stamps will reflect this time zone specification.
- Currency Symbol: Use this field to select the desired currency symbol for your store, such as a dollar sign or pound sign.
-
Currency Code: Use this menu to select the standard 3-letter currency code that will be used for your payment gateway. For example:
- USD - US Dollar
- CAD - Canadian Dollar
- EUR - Euro
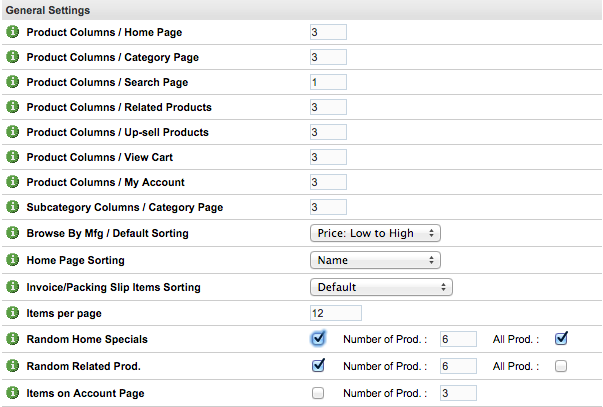
General Settings
- Product Columns/Home Page: This field allows you to set the number of columns that will display items marked as "Home Specials" on your store's homepage.
- Product Columns/Category Page: This field is used to set the number of columns that will be used to display items on each category page.
- Product Columns/Search Page: This field controls the number of columns that display product listings when a user searches your store.
- Product Columns/Related Products: This setting is used to control how many columns will display Related Items on product listing pages.
- Product Columns/Up-sell Products: This setting is used to control the number of columns used to display up-sell items on product listings.
- Product Columns/View Cart: If you've enabled the "Items on View Cart" option (located further down this page), this setting will set the number of columns used to display related items.
- Product Columns/My Account: If you've enabled the "Items on Account Page" option (located further down this page), this setting specifies the number of columns used to display related items.
- Subcategory Columns/Category Page: This field allows you to specify how many columns you'd like to display your category's subcategories.
- Browse by Mfg/Default Sorting: This field sets the default sorting for the Browse by Manufacturer page.
- Home Page Sorting: This field specifies the default sorting method for products appearing on the homepage as "Home Specials".
-
Invoice/Packing Slip Items Sorting: This dropdown is used to control how your store's order items are sorted on printed Invoices and Packing Slips. The choices are:
- Default: Items are sorted in the order by which they are added to the shopper's cart
- Product Part Number: Items are sorted alphabetically by their Part Number (ID/SKU).
- Product Name: Items are sorted alphabetically by their product name.
- Extra Fields 1-4: Items are sorted by the information listed in the Products' extra fields 1, 2, 3, or 4.
- Warehouse Location: Items will be sorted by their appointed Warehouse Locations (this is useful in expediting the order shipping process for inventory staff).
- Items per Page: This field allows you to control the default number of items displayed on each category page. This is applied before the pages are split into page number navigation (e.g. page 1, page 2, etc.).
-
Random Home Specials: This setting allows you to randomize the products that display on the homepage when they are set up as "Home Specials". Each time the homepage is refreshed, a different assortment of home specials will appear. To enable this setting, mark the checkbox that is furthest left. 2 subsettings of this feature that may also be configured are:
- Number of Prod.: How many items will be displayed on the homepage as "Home Specials"
- All Prod.: Select this option if you'd like for all of your products to be displayed as Featured Items on the homepage, even if they aren't designated as Home Specials. This option is useful if you'd like to create a rotating display of all of your items on the homepage.
-
Random Related Products: This feature is similar to the Random Home Specials option, but will only apply to your related products. To enable this feature, mark the checkbox furthest to the left. 2 subsettings of this feature that may also be configured are:
- Number of Prod.: The number of items that will be displayed on the product listing pages as Related Items.
- All Prod.: This option is useful if you'd like for all of your products to be displayed as Related Items, even if they aren't designated as related items individually. This option is useful if you'd like to create a rotating display of all your items on each individual product's listing pages.
- Items on Account Page: This setting allows you to display related items on your customers' "My Account" pages. Click on the checkbox to enable this. You may also enter the number of products you'd like to be displayed in the textbox.
- Admin Session Time Out: This field allows you to set the amount of idle time that can pass before you are automatically logged out of the Store Manager.
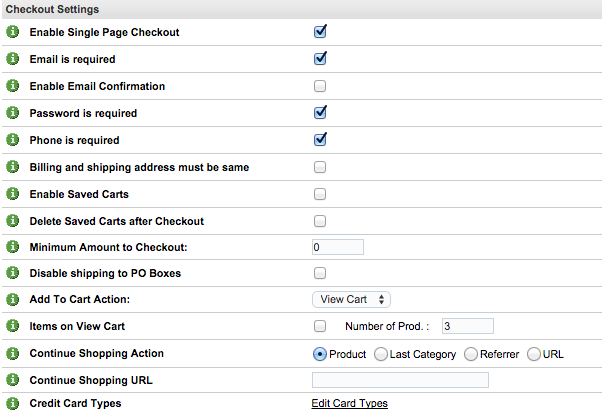
Checkout Settings
- Enable Single Page Checkout: In a normal checkout process, your customers are taken to the shipping screen to enter shipping information, and then the shipping costs are calculated. They are then taken to the billing page where they enter billing information. With the Enable Single Page Checkout setting, you can use a single page checkout page that contains both shipping and billing information on the same page.
- Email is required: By default, this setting is enabled. It will require cusotmers to enter an email address at checkout, so that there is an email address available to the merchant for order confirmation emails. If you'd like to turn this option off, you may do so by unchecking this checkbox and clicking Save Changes at the top of the page.
- Enable Email Confirmation: This option allows you to add an email confirmation box to the final Checkout pages, so that shoppers will be required to enter their email address twice. This minimizes the chances of them having mistyped their email address in the first form.
- Password is required: Similar to the Email Requirement above, this setting will control whether the customer is required to enter a password when checking out. This setting is enabled by default.
- Phone is required: This controls whether the shopper's phone number is required upon Checkout.
- Billing and shipping address must be same: If you'd like your customers' billing and shipping address to be the same, click the checkbox next to this setting.
- Enable Saved Carts: This setting allows your shoppers to save their cart items for future purchases.
- Delete Saved Carts after Checkout: If using the Saved Carts feature, this setting will delete the saved carts after shoppers complete a checkout of a saved cart order.
- Minimum Amount to Checkout: Use this setting to specify the minimum dollar amount of the order required before your customers are able to check out. This is useful if you'd like to dictate a qualifying minimum purchase price.
- Disable shipping to PO Boxes: Some carriers will not ship to PO Boxes, and may charge additional fees to do so. This setting allows you to disable shipping to PO Boxes.
-
Add to Cart Action: Use this setting to specify what happens when your shoppers click the "Add to Cart" button for a product. Your options are:
- None: No action is taken
- View Cart: Shopper is taken to the View Cart page
- Checkout: Shopper is taken directly to the checkout screen(s)
- QuickCart: Your store's QuickCart pop-up screen is displayed
- Items on View Cart: Use this setting to display "Related Items" on the View Cart page. Enter the number of Related Items you would like displayed in the Number of Prod. textbox.
-
Continue Shopping Action: This setting controls where the customer will be directed when they click "Continue Shopping" from their View Cart page. The choices are:
- Last Product: The product that has just been placed in their cart
- Last Category: The category that was last visited before placing the item in their cart
- Referrer: If the shopper was directed from a referring page, this option will redirect them back to that page
- URL: A specific URL that you'd like to direct your customers to after clicking Continue Shopping
- Continue Shopping URL: This will be the URL you specify for the Continue Shopping Action: URL option outlined above.
- Credit Card Types: Click "Edit Card types" to configure which cards will display on your checkout payment options.
Orders Settings
- Allow Phone Orders Custom Prices: This setting allows you to edit the item price when placing a phone order.
- Order Status: The Edit Order Status link allows you to configure the order status queues that are used for incoming orders.
- Invoice Number: The Edit Invoice Number link allows you to configure your store's invoice number sequence for orders as they are placed.

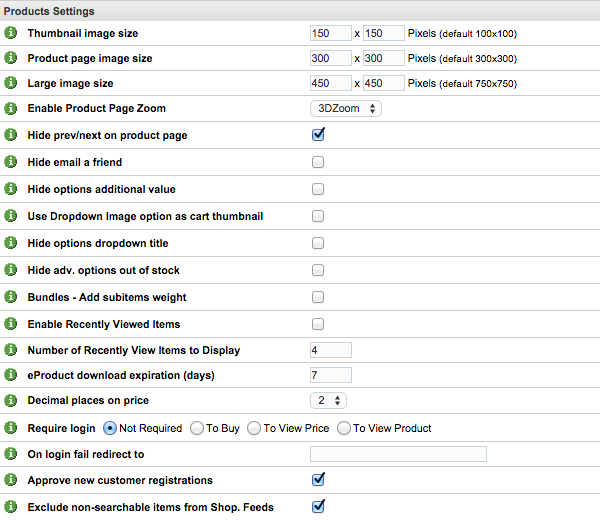
Products Settings
- Thumbnail image size: Use these fields to enter your desired Product thumbnail image size.
- Product page image size: Use these fields to enter your desired Product listing image size.
-
Large image size: Use these fields to enter your desired main image size.
Note: These image size settings only effect images uploaded through the store manager's File Manager, or when using the batch resize options in the File Manager. Images that are uploaded through FTP will not be resized.
- Enable Product Page Zoom: This setting allows you to select which product image zoom feature you'd like to use when your products' listing images are clicked. The choices are 3dZoom and none, which would disable zooming.
- Hide prev/next on product page: This setting allows you to have Previous and Next navigation links on product listing pages, allowing navigation through other items in the product's category. Mark the checkbox to enable this feature.
- Hide email a friend: This setting allows you to hide the "Email a Friend" option on product listings. When enabled, this setting will place a link on each product page that will allow customers to email their friends a link to the product.
- Hide options additional value: This setting allows you to hide any additional costs of product options. By default, this setting is set to show the full price when options have additional costs.
- Use Dropdown Image option as cart thumbnail: When using options with the dropdown image feature, this setting will take the selected option's dropdown image and add it to the View Cart page to show which option was added to the shopping cart. For example: if a sweater that comes in blue, black and yellow is added to the cart with the color blue selected, the image on the View Cart page will be the sweater in blue.
- Hide Options Dropdown Title: When using dropdown product options, the dropdown will list the option's title as the first listing in the menu by default. For example, if you have an option for "Size" and the choices are S, M and L, the dropdown will show the title of the option "Size" as the first listing in the dropdown menu. Marking this checkbox will hide the option's title, and instead show the first option listing instead.
- Hide adv. options out of stock: When using Advanced Options with Inventory Control, this setting hides the options when they are out of stock.
- Bundles - Add subitems weight: When using the Product Bundle option, this setting will total the bundled item weights into the total order weight calculations.
- Enable Recently Viewed Items: Enable this setting if you'd like your shoppers to see recently viewed items.
- Number of Recently View Items to Display: If you've enabled the "Enable Recently Viewed Items" setting, this setting allows you to designate the number of Recently Viewed items to display.
- eProduct download expiration (days): This field determines how long eProduct download links will be active on the site. The expiration time is measured in days.
- Decimal places on price: This feature allows you to designate the number of decimal places your product prices will contain. This can be useful if your products are small and have fractional values (such as $0.055) but must be ordered in large quantities.
- Require login: This setting allows you to designate whether customers are required to log into their accounts to view price, buy, or view product information for your products. By default, this setting is disabled.
- On login fail redirect to: This field is used to designate a URL you'd like your customers to be redirected to if their login attempt fails. (Used alongside the above "Require Login" setting)
- Approve new customer registrations: When enabled, this setting will allow new customer registrations to be automatically approved. This applies to default customers that do not belong to a customer group.
- Exclude non-searchable items from Shop. Feeds: Use this setting if you'd like to make certain items excluded from your shopping feeds (Such as Yahoo Shopping). To exclude a product, label it as "Non-Searchable" in its product listing page.
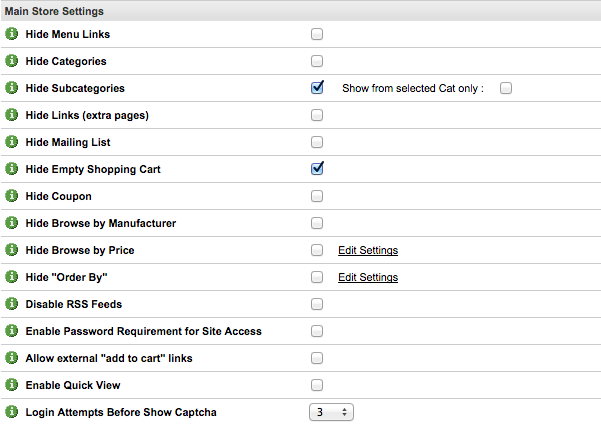
Main Store Settings
- Hide Menu Links: This setting is used to hide the menu links at the top of your store's pages.
- Hide Categories: If enabled, this checkbox hides your categories from the navigation menus on your store's pages.
- Hide Subcategories: Similar to the Hide Categories setting, this option will hide only the Sub-Categories from your store. The "Show from selected Cat. only" option hides the sub-categories from the navigation, unless the parent category is selected.
- Hide Links (extra pages): If you have any extra pages, as determined in your store's Site Content section (Settings Design Site Content), this setting hides these links from your store.
- Hide Mailing List: When enabled, this setting hides your site's Newsletter subscription field from the navigation.
- Hide Empty Shopping Cart: When browsing your site, a customer's view of the store will include a navigation bar element that shows how many items are currently in their cart. If no products are chosen, the navigation element will display the message "Shopping Cart is Empty". If this setting is enabled, it will hide this notice if there are no items in the cart.
- Hide Coupon: On the shopping cart preview page, your customers have the ability to enter a coupon or gift certificate code to apply to the order. If this setting is enabled, the coupon field will be hidden.
- Hide Browse by Manufacturer: This setting allows you to hide the manufacturer browse option from your store's navigation. (This will only work if you have specified manufacturers and linked them to products)
- Hide Browse by Price: This setting will hide the "Browse by Price" function from your site's navigation.
- Hide "Order By": By default, customers can sort Category Page views by Price, Newest, or Name. By marking this checkbox, you would hide this option.
- Disable RSS Feeds: By default, customers can subscribe to an RSS feed of your products, which will automatically update them on product and inventory changes when they subscribe to your RSS feed. By marking this checkbox, your store's RSS Feed will be disabled.
- Enable Password Requirement for Site Access: This feature allows you to close your site's navigation for customers unless they log into their account.
- Allow external "add to cart links": Enable this setting if you'd like to allow "Add to Cart" links from external sites.
- Enable Quick View: Enable your store's Category Quick View feature.
- Login attempts before show Captcha: From the dropdown menu, you may select the number of failed login attempts that will be permitted before the store prompts the user for a CAPTCHA verification.
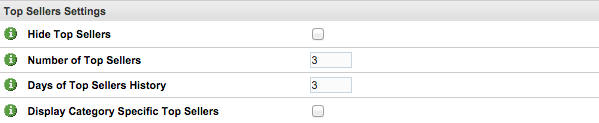
Top Sellers Settings
- Hide Top Sellers: If enabled, this setting will remove your store's top sellers from the navigation.
- Number of Top Sellers: This option allows you to specify the number of "Top Seller" items that are listed in your store's navigation.
- Days of Top Sellers History: This setting allows you to designate the number of days of Top Seller history the store will use for this display.
- Display Category Specific Top Sellers: This setting allows you to designate top sellers specific to the categories that are being viewed.
New Releases Settings
- Hide New Releases: Your store's newest items will be shown in the navigation menu. By enabling this setting, New Releases will be hidden.
- Number of New Released Items: This setting allows you to set how many new releases the display will cycle through.
- Display Category Specific New Releases: This setting allows you to specify new releases for the category being viewed.
Additional Information: An item's designation as a "New Release" is determined by its "Date Available" setting, which can be found in the product's Advanced Tab. Products with more recent "Date Available" dates will display in the New Release areas. This display is randomly populated from the store's top 50 newest items.

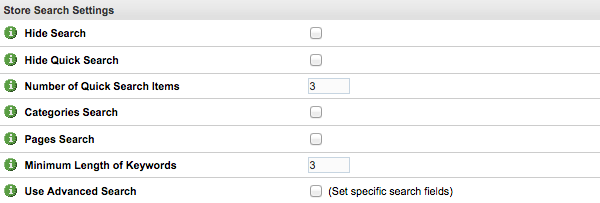
Store Search Settings
- Hide Search: Enable this setting if you'd like to hide the store's Search function.
- Hide Quick Search: The search bar can generate a listing of search results based on characters being typed into the search bar. For example, if "swe" is entered, sweaters, sweatpants, and sweatshirts will appear in the search area. By marking this checkbox, Quick Search will be disabled.
- Number of Quick Search Items: This setting allows you to set the number of "Quick Search" items that will be displayed.
- Categories Search: By default, search results will only apply to product listings. If you enable this setting, search results will also include Category pages.
- Pages Search: This setting enables search results to include general pages that are not always product-related.
-
Use Advanced Search: This setting enables the search function to include advanced product parameters to find results. By enabling this setting, your listing will expand to include the following options you can select. These advanced search options can be configured individually as needed:
- Search in Product ID: Product ID will be used in the search
- Search in Product MFGID: This corresponds to the product's Manufacturer ID
- Search in Product Name: Keywords will be searched on the product names
- Search in Product Extended Description: Include product's long description for search parameters
- Search in Product Keywords: This includes product keywords during search
- Search in Product Description: Include the product's short description in the search
- Search in Product Extra Field 1 through 10: If using Extra Fields, these can be used in the search with this setting
Additional Information: An item's designation as a "New Release" is determined by its "Date Available" setting, which can be found in the product's Advanced Tab. Products with more recent "Date Available" dates will display in the New Release areas. This display is randomly populated from the store's top 50 newest items.
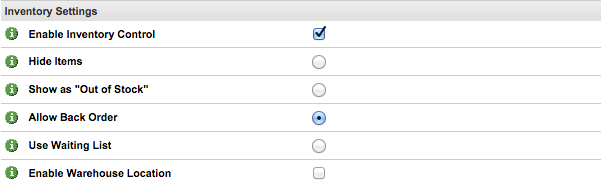
Inventory Settings
-
Enable Inventory Control: This setting allows your store to track and manage your store's inventory levels.
Enabling Inventory Control will add an area for Stock numbers in your products' Information Tabs. You can then choose one of the following Inventory Display options for when the item's stock level reaches 0.
- Hide Items: If enabled, items with a stock level of 0 will be hidden.
- Show as "Out of Stock": Enable this setting if you'd like for items with a stock level of 0 to display as "Out of Stock". Customer will not be able to purchase the product.
- Allow Back Order: Enabling this feature will allow back order of an item when its stock reaches 0. Customers will be able to purchase the item, with the understanding that the item will be shipped to them when the inventory is replenished.
- Use Waiting List: This option will allow customers to add themselves to a waiting list when an item is out of stock. They will be unable to order the item, but they you can notify them when it is in stock again.
- Enable Warehouse Location: This setting allows you to add warehouse/pick ticket information added to the individual products.
Email Settings
- Send order alert to email addresses: This setting allows you to set which email address(es) will receive the "New Order" notification emails. You can add up to 25 email addresses, separated by commas.
-
Send email for Order Statuses: These settings determine which system-generated emails will be automatically sent to your customers when their order status changes.
- New: Brand new order is placed, and hasn't shipped yet.
- Processing: Order is moved manually by merchant from "New" to "In Process".
- Partially Shipped: Part of the order has been shipped.
- Shipped: The order is completely shipped to the customer.
- Canceled: The order has been canceled.
- Unpaid: The order is received but not yet paid, so it is not technically a New Order.
- On Hold: Order status has been changed to "On Hold".
- Custom 1 through 3: Order status has been changed to any of your three custom order statuses.

Advanced Settings
- API Settings: By clicking Change Settings, you can view your current API passkey and configure your API settings as needed.
- Scheduled Scripts: Use this link to view and manage the various scripts running on your store.

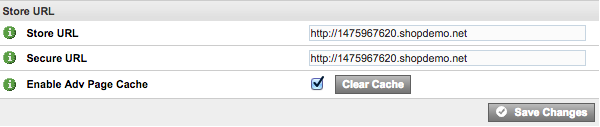
Store URL
- Store URL: This will be your store's main URL that will be used for the site's navigation. When your account is first created, this setting will reflect your .3dcartstores.com URL. If you are using a custom domain name, after transferring your DNS information, you will edit the domain name here to your custom URL. For instructions on doing this, see this article.
- Secure URL: This will be the URL your site uses for all secure links and navigation URLs, such as the sign-in and checkout pages. If you are using your own installed SSL certificate, you can update this to your custom domain name with https://www. as the prefix. If you do not have an SSL with your custom domain name, DO NOT change this URL.
- Enable Adv Page Cache: This setting allows you to turn the store's cache on or off for the Homepage and Category Pages. You can also clear the store's cache as needed by clicking the "Clear Cache" button next to this setting.