1stPayPOS Support
Printer Setup
Before completing the printer setup, make sure you have already named the printers. See here for further instructions on naming the printers. Each printer must be connected to the same router/network that is providing the iPad with its WiFi connectivity.
Configure Printer in App
- Tap the bar to the left and you will see a pull out menu. Select Settings.
- Tap Printers.
- Select Star Printer.
- Tap Configure Printer.
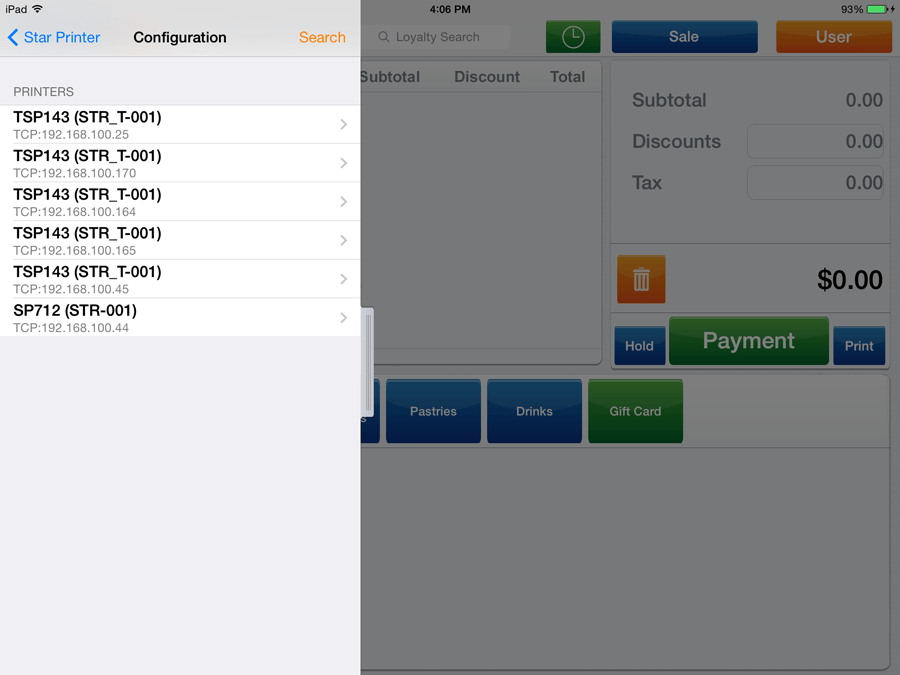
- The app automatically identifies the available printers. SP712 is the Kitchen Printer and TSP143 is the receipt printer. Click on SP742 (STR-001) to setup the kitchen printer. If the merchant has 2 kitchen printers, the model name will appear twice.

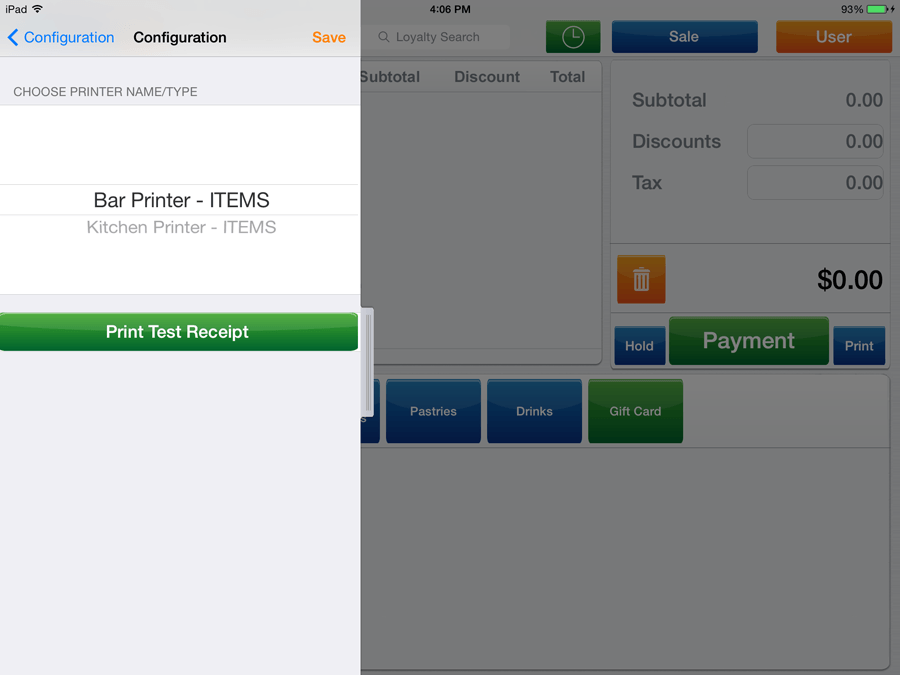
- The printer names that were previously created (see here) will appear... Select the name and tap Save. If the merchant has 2 kitchen printers, tap Print Test Receipt to ensure that the correct name is associated with the correct printer.

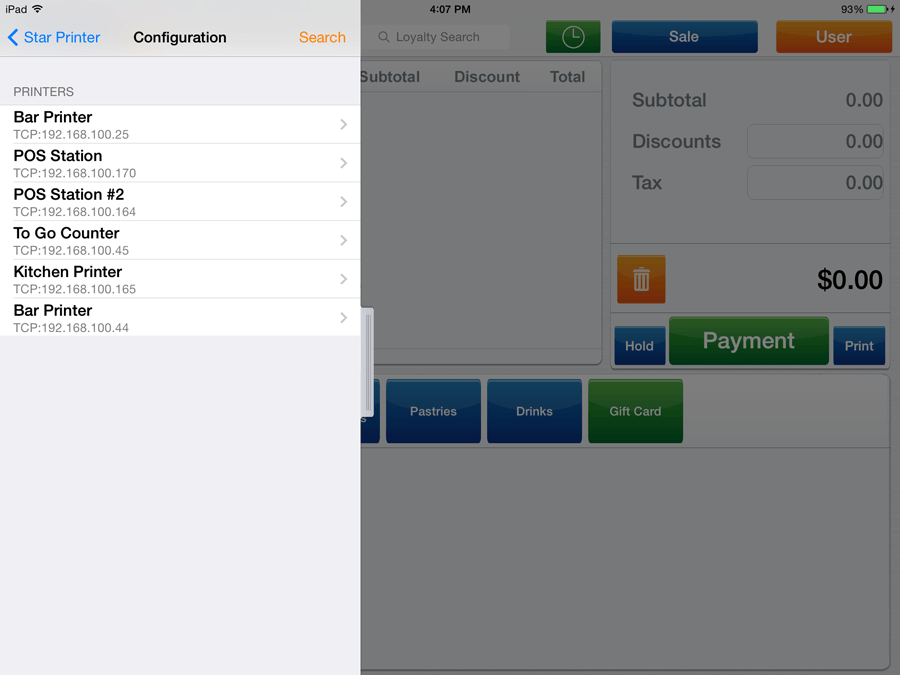
- The SP712 name no longer appears. It will be replaced by the name that was created. Select the TSP143 (STR_T-001) printer.
- The printer names that were previously created (see here) will appear. Select the name and tap Save.
- The original printer names have been replaced by the user's custom names.

Setup Receipt Printers
To view instructions for setting up Receipt Printers and other Hardware, read here.
